Tutorial Tuesday: Dreamy Photo
After sharpening up a photo last week, I thought it would be fun to go the opposite direction this week and create a “dreamy” effect. I found the perfect tutorial on medialoot and was able to follow it quite well with a few minor adjustments. You can head over there to try it out, or follow my steps here 🙂 The only thing I really had an issue with was downloading their Bokeh overlay, but there are several of those in our shop.
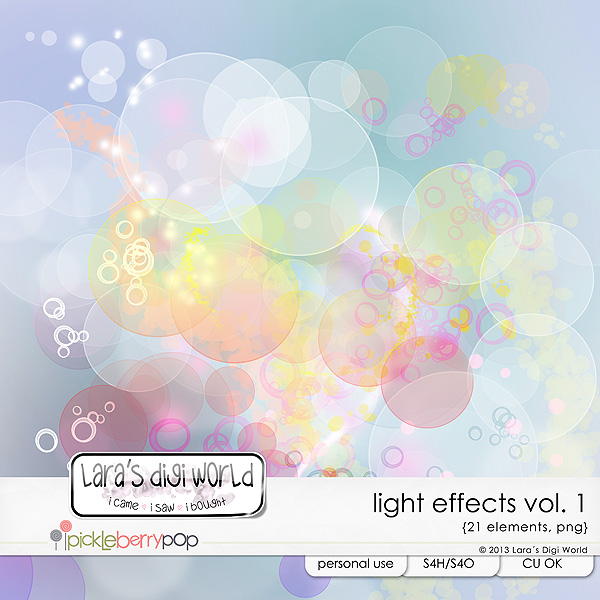
I decided to use Light Effects Vol 1 by Lara’s Digi World:
On to how I got this tutorial done… All images open in new tabs so you can see the details when needed
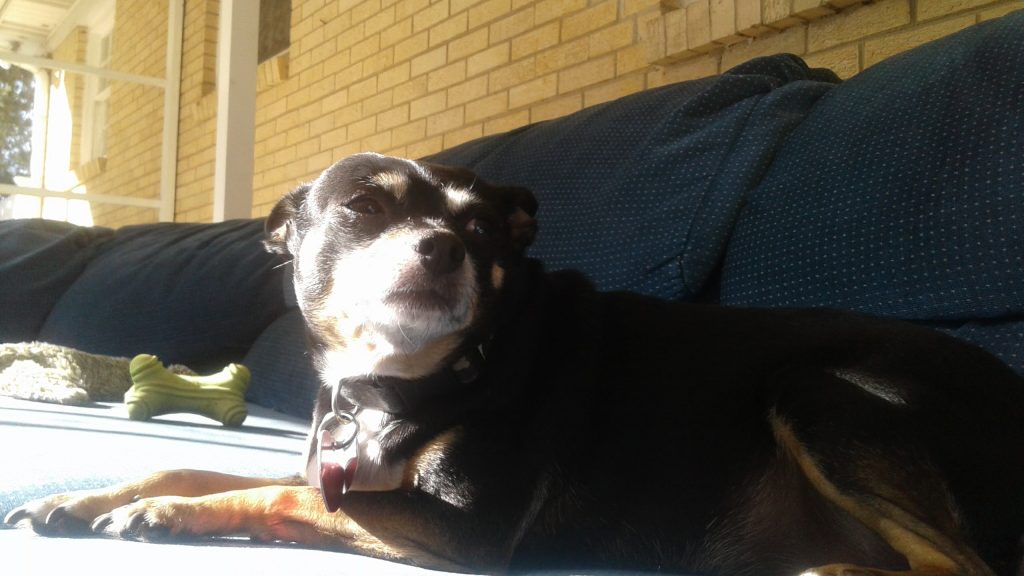
Open your photo in Photoshop. This is what I’m starting with:
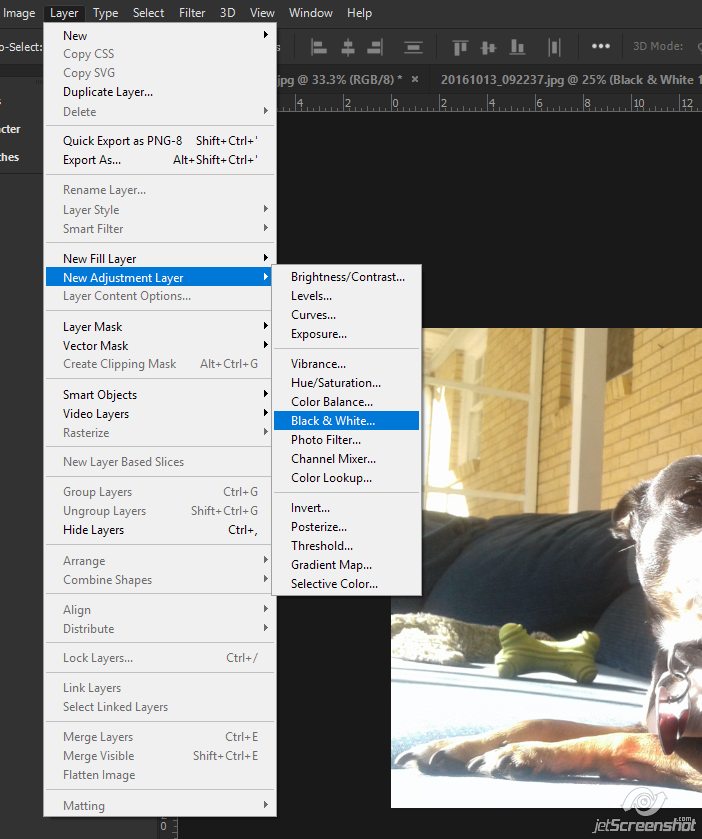
Go to Layer > New Adjustment Layer > Black & White
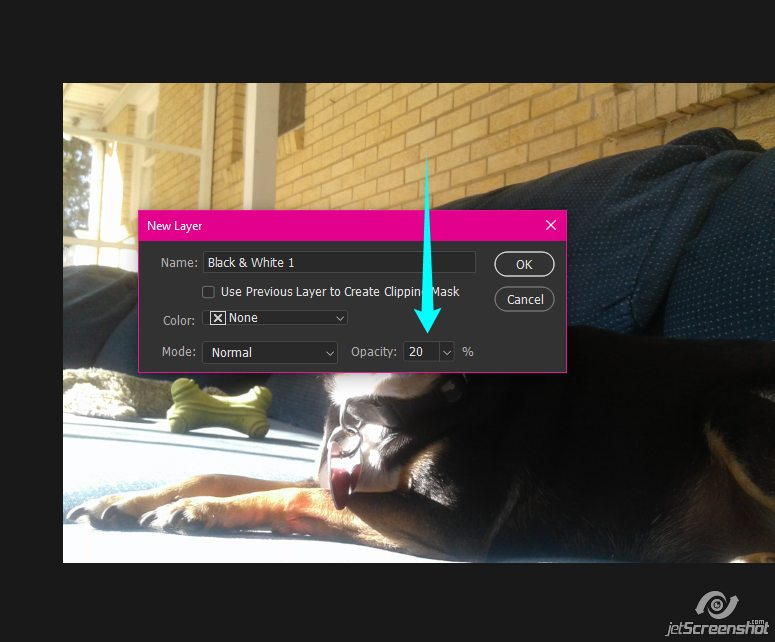
Change the opacity to 20% and click OK
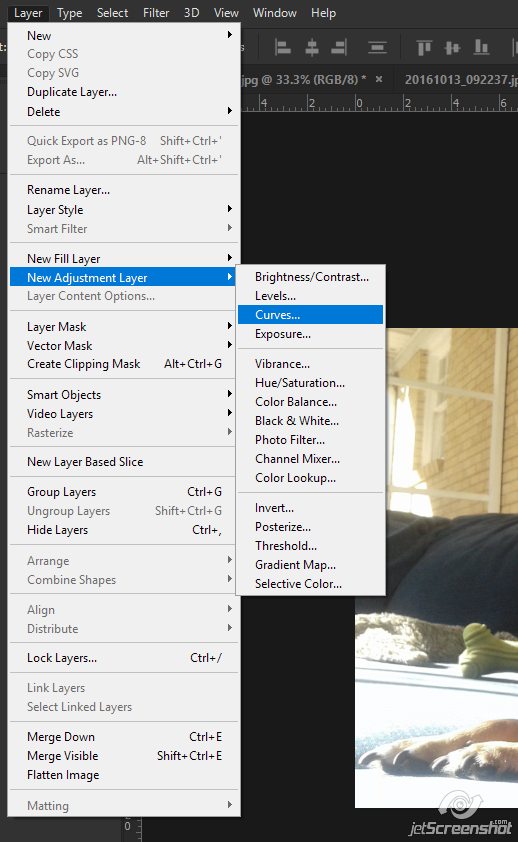
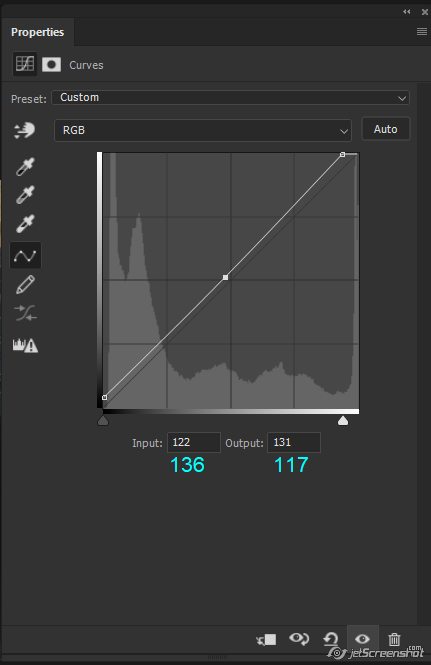
Go to Layer > New Adjustment Layer > Curves:
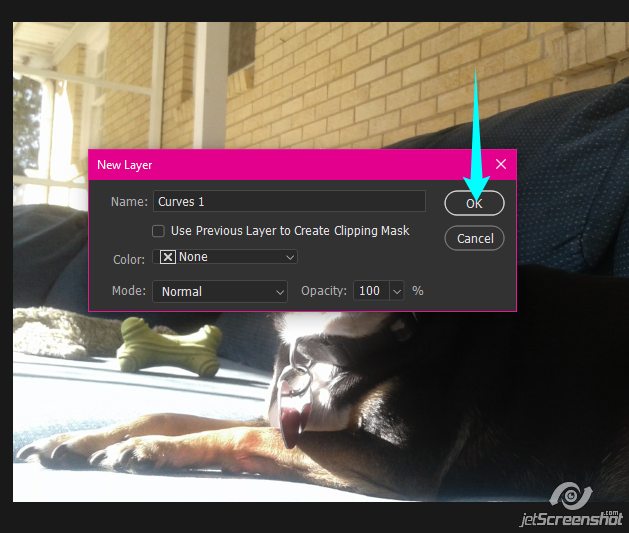
Leave the settings at Normal and 100% opacity, and click OK
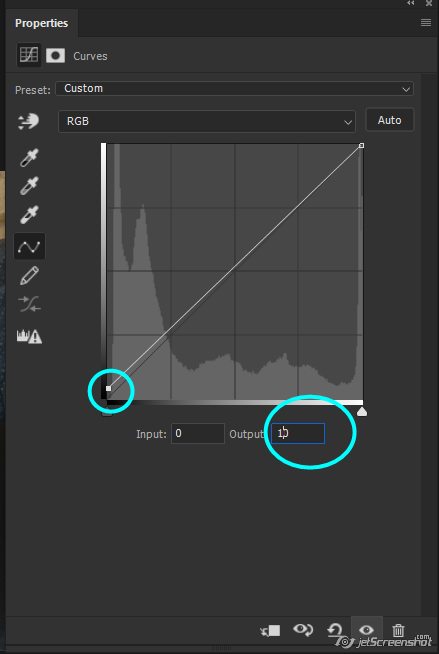
On the Properties tab, click on the lower left node and change the Output to 10
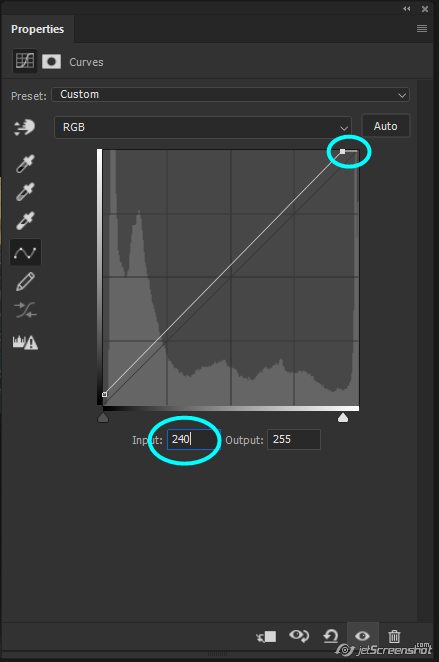
Then click on the upper right node and change the Input to 240
Click in the middle of the line (doesn’t have to be exact center) and change Input to 136 & Output to 117
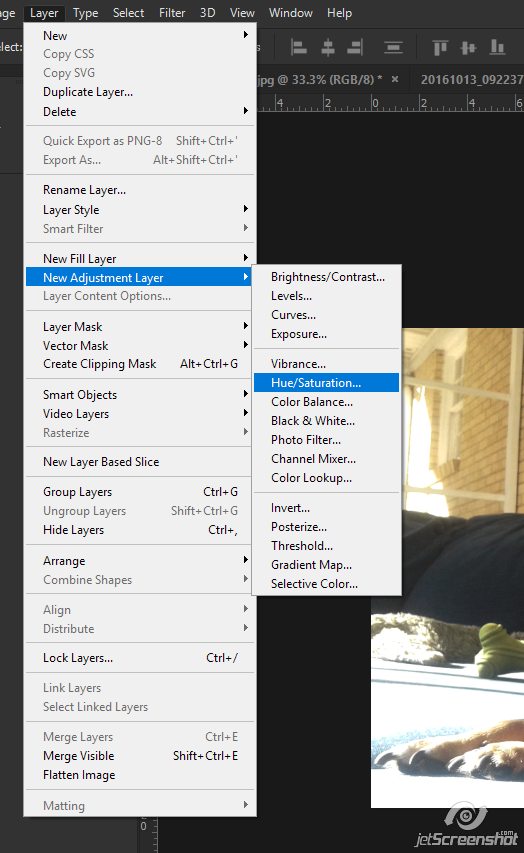
Go to Layer > New Adjustment Layer > Hue/Saturation:
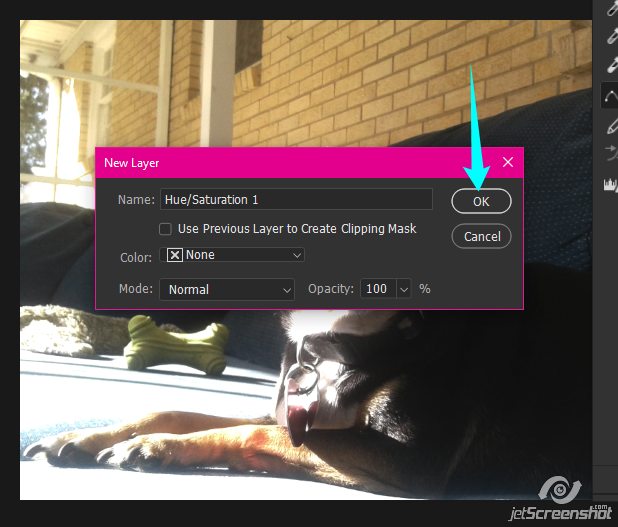
Just click OK:
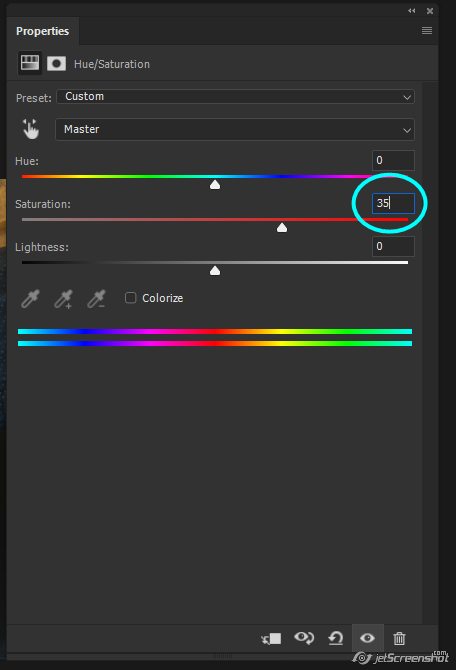
Change the saturation level to 35
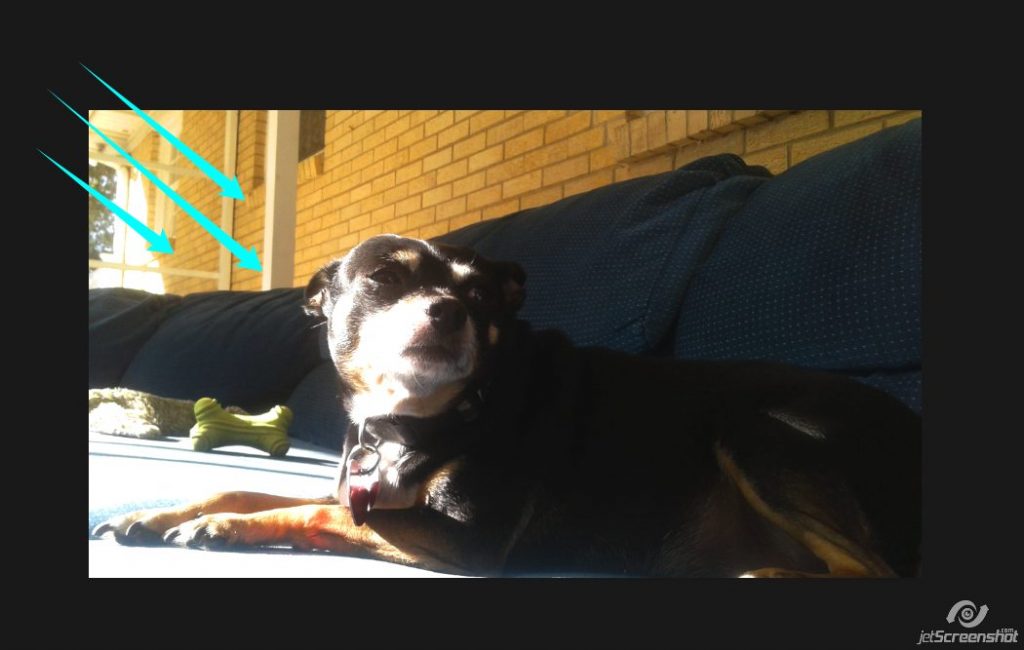
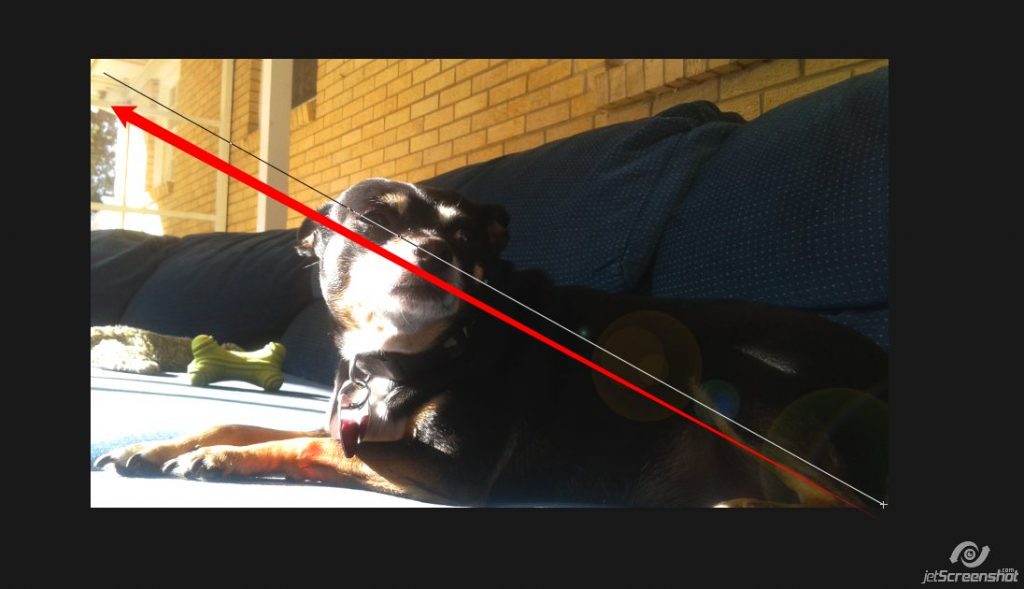
Now you need to determine where your light source is coming from. You’ll need to remember this to add the Lens Flare in a minute. In my photo the sun is shining down from the upper left:
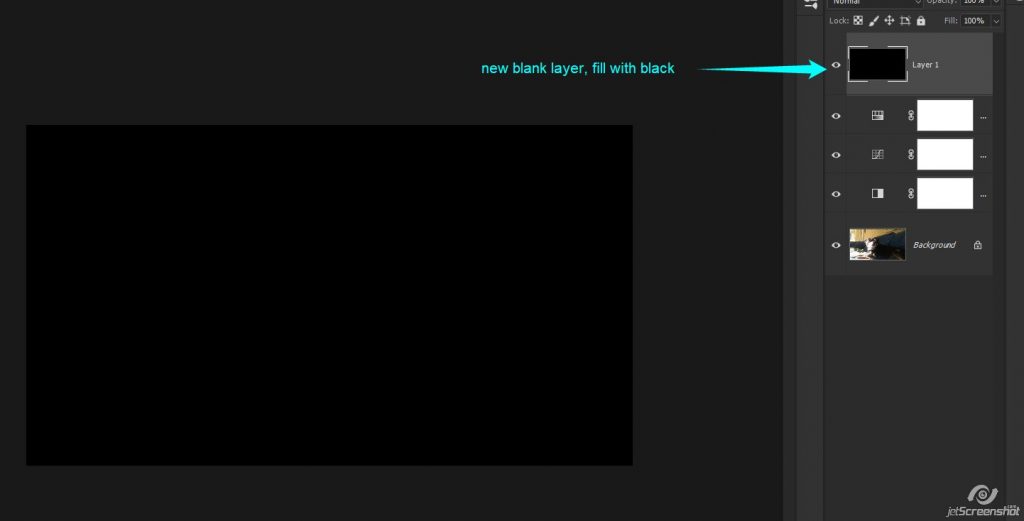
Make a new layer and fill it with black:
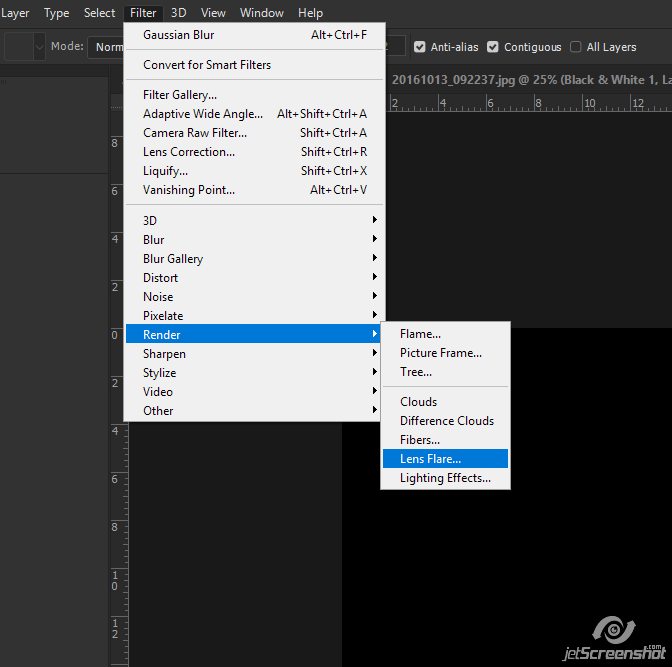
Go to Filter > Render > Lens Flare:
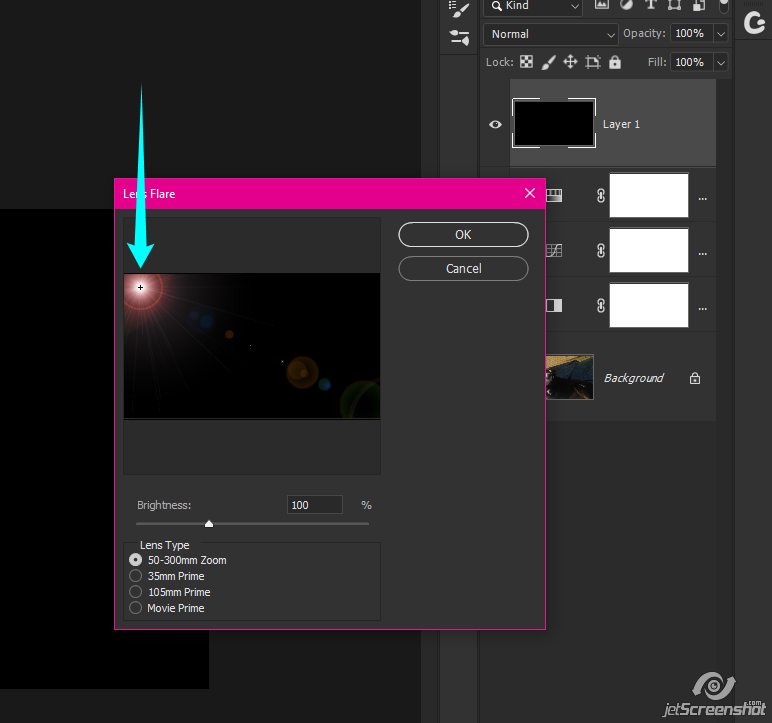
Because my light source is coming in from the upper left, I’m going to move my flare to the upper left corner. Regardless of where you move your Lens Flare to, keep brightness at 100 and the lens type at 50-300mm zoom
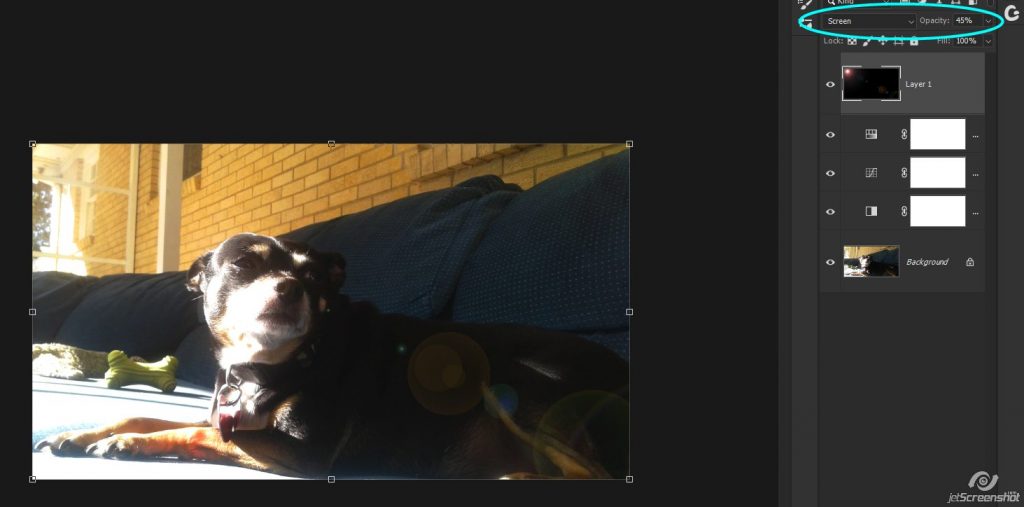
Change the blend mode to Screen and the Opacity to 40%
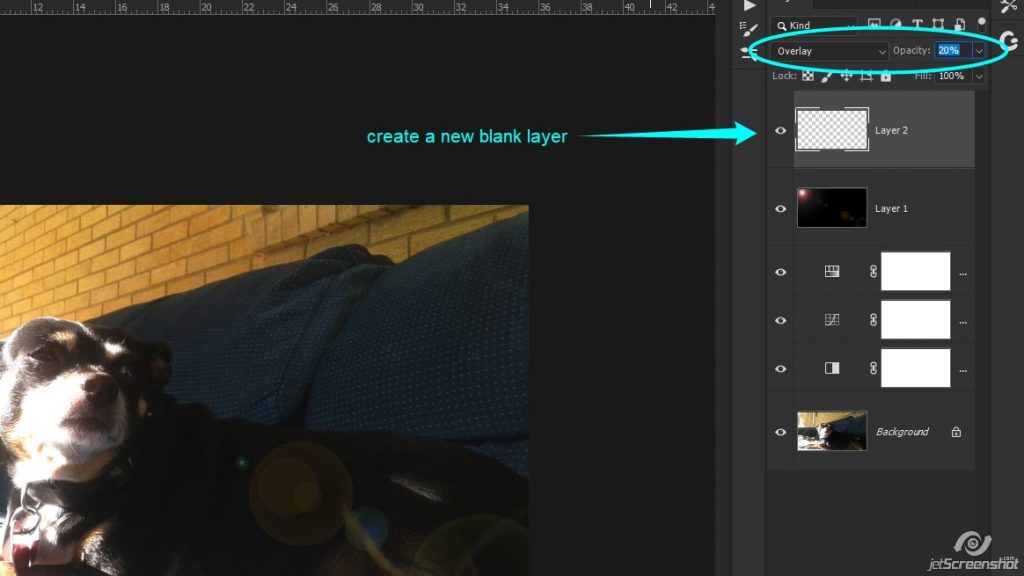
Create a new blank layer. Change the blend mode to Overlay and Opacity to 20%
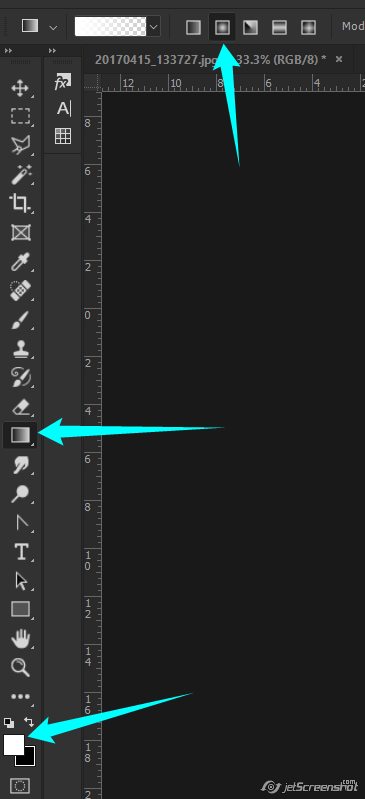
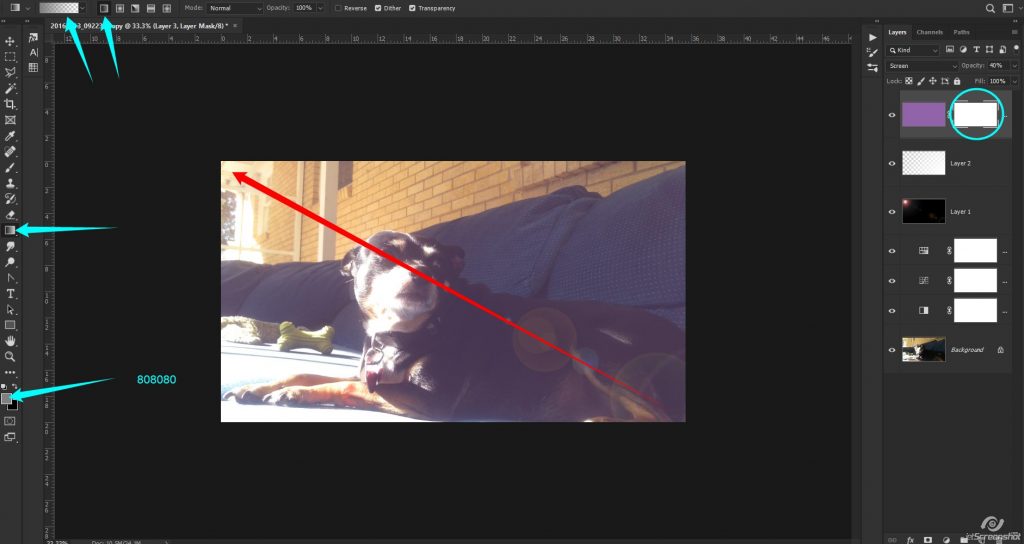
Change your foreground color to white, choose your Gradient fill tool. Click on the Radial Gradient button.
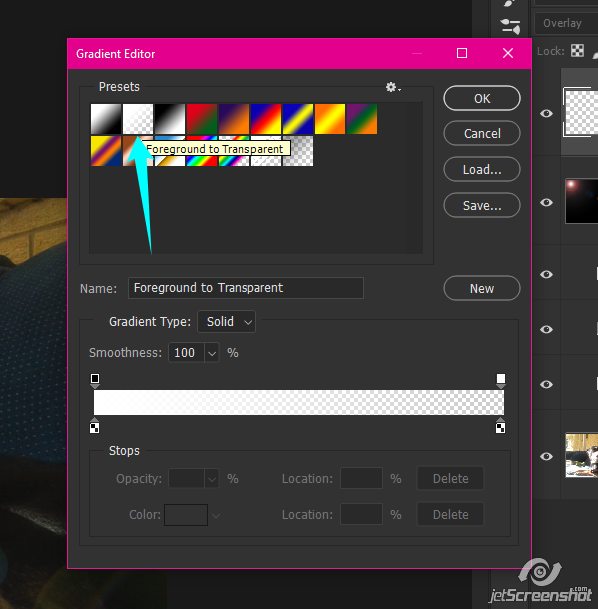
If your gradient fill is not white to transparent, double click on the gradient and click on the foreground to transparent gradient.
Click your mouse in the lower right corner and drag it to the upper left corner of your photo to create the white-transparent gradient:
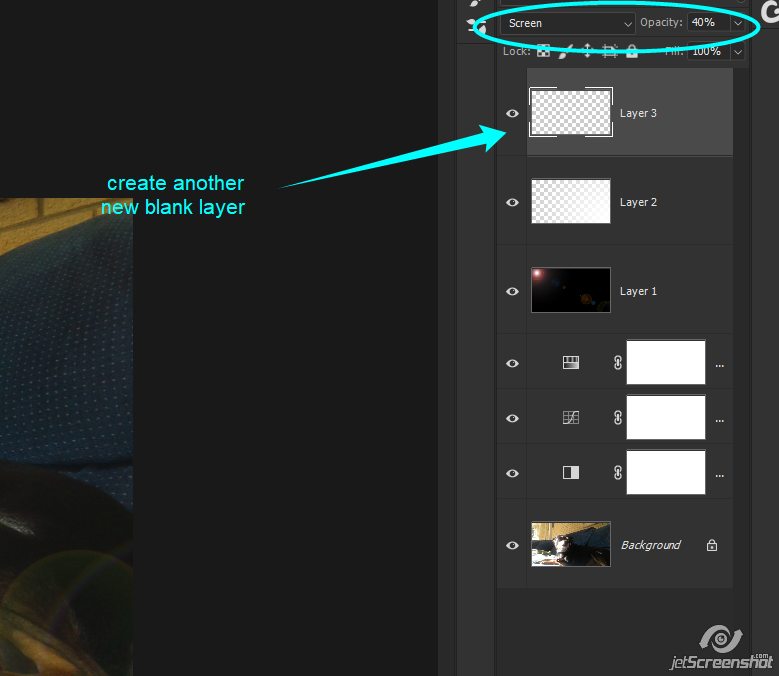
Create another new blank layer. Set the blend mode to screen and the opacity to 40%
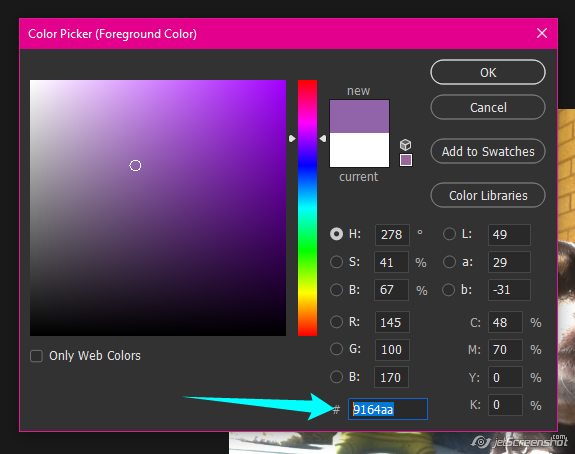
In your color picker, change the foreground color to 9164aa
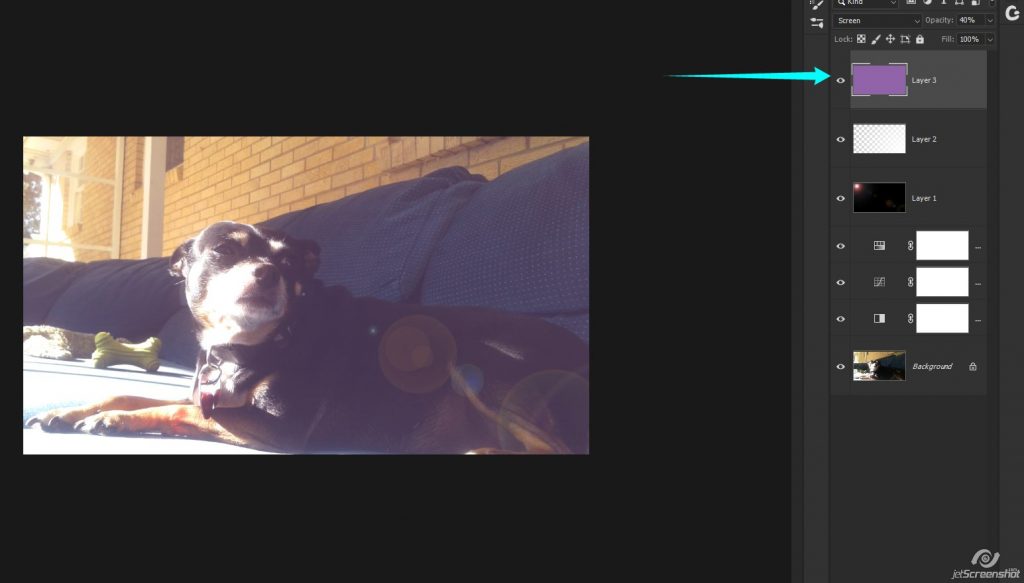
Fill your top layer with this color:
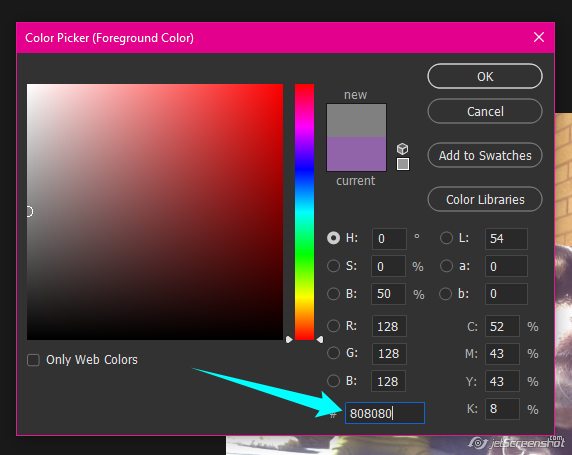
Now change the foreground color to 808080
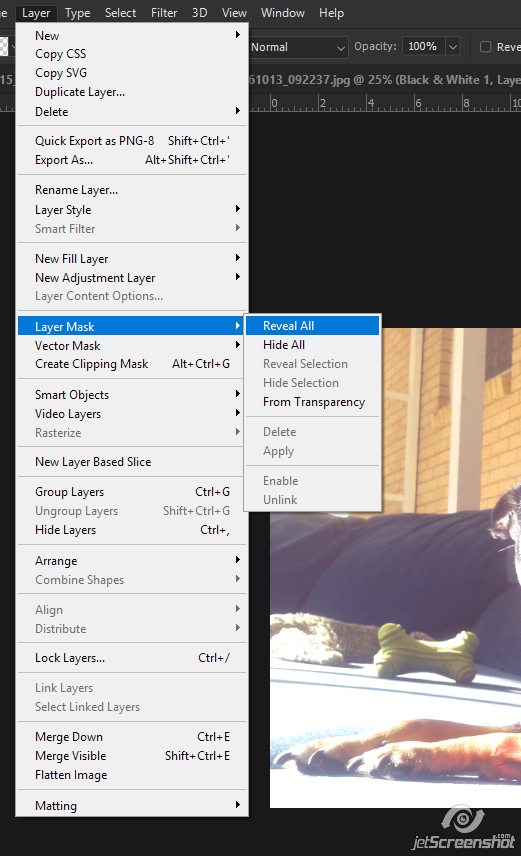
With the purple layer selected in the layer palette, go to Layer > Layer Mask > Reveal All
Click on the mask to make sure it’s selected and click the Linear gradient button. Then click your mouse in the lower right corner of the photo and drag it to the upper left corner. Your gray gradient should show up on the mask
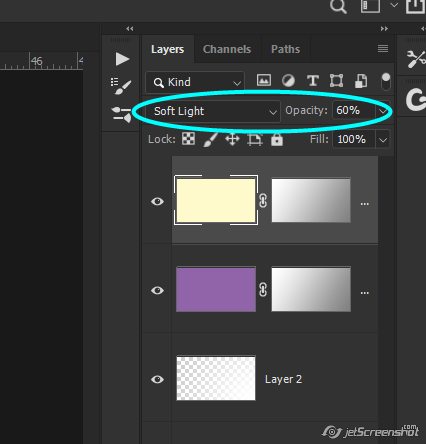
Duplicate the purple masked layer and change the fill to fefacb
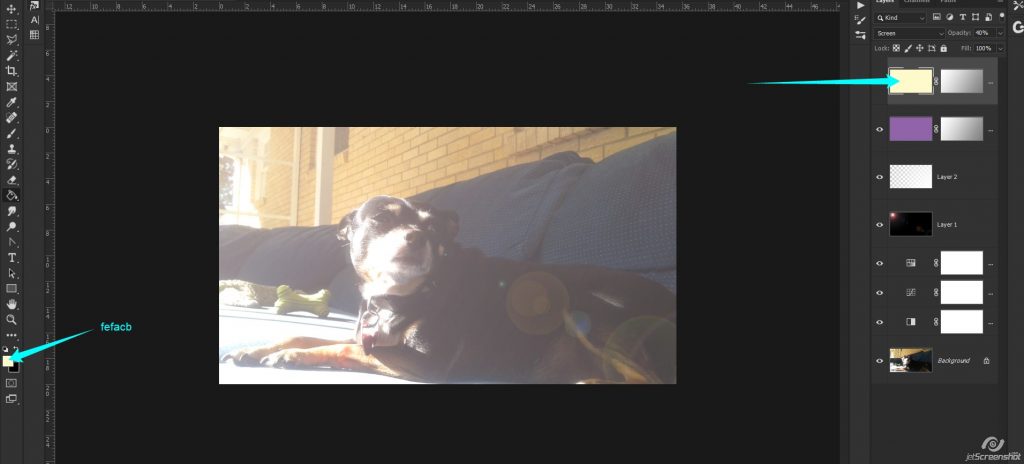
Change the Blend mode to Soft Light and Opacity to 60%
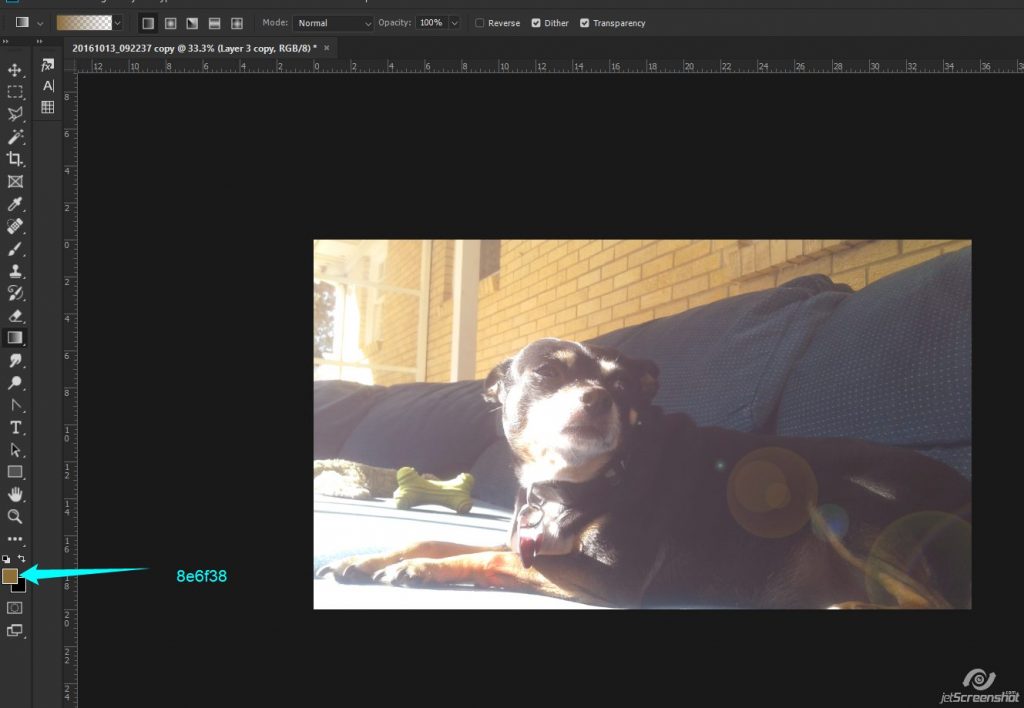
Now change your foreground color to 8e6f38
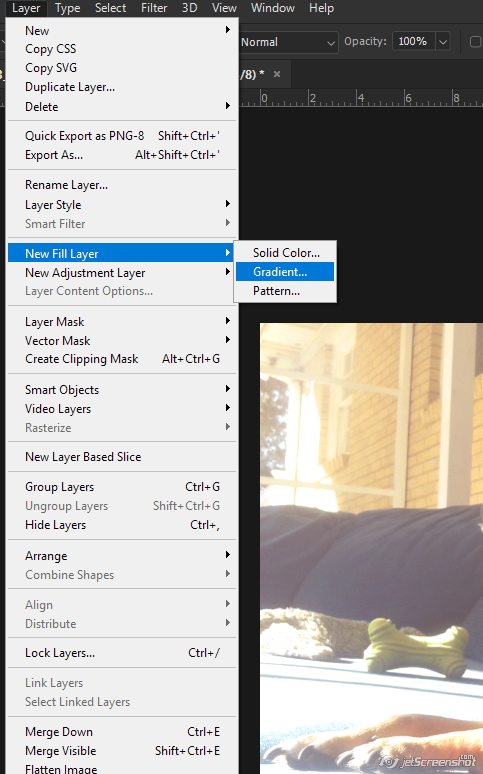
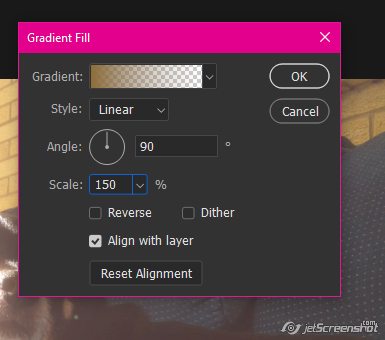
Go to Layer > New Fill Layer > Gradient
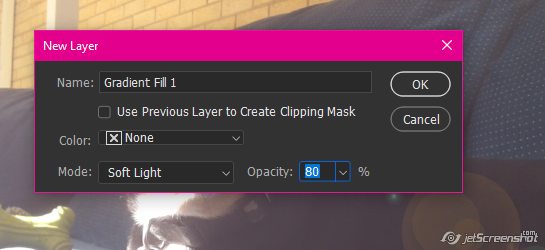
Change the mode to Soft Light and Opacity to 80% then click OK
The style should be Linear, angle 90* and change the scale to 150%, then click ok.
GREAT! We’re almost done! Now you can add your Bokeh!
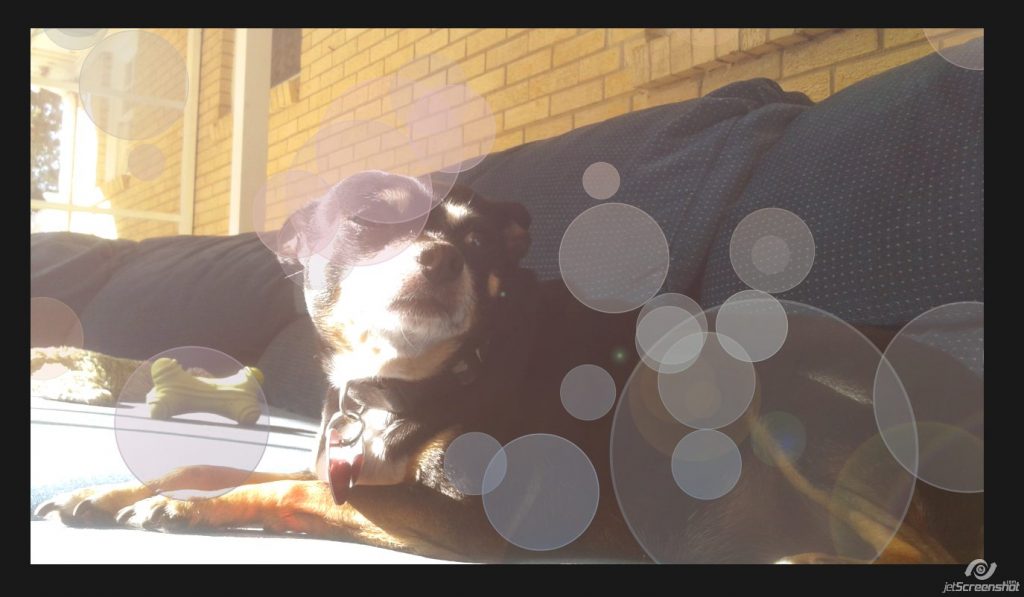
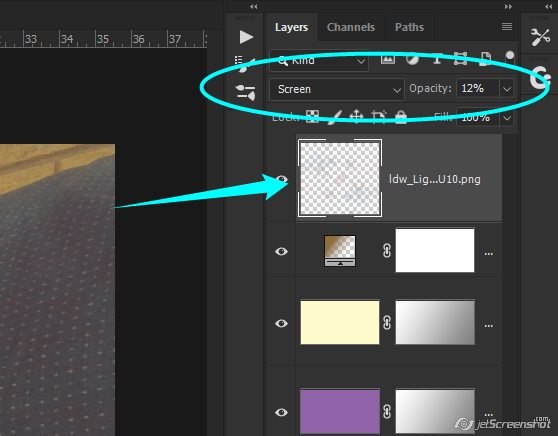
Go to Filter > Blur > Guassian Blur and blur the bokeh 2px. Change the blend mode to Screen and Opacity is up to you. The original tutorial on medialoot said 20%, but I didn’t like that and bumped mine down to 12%:
Here’s my finished photo:
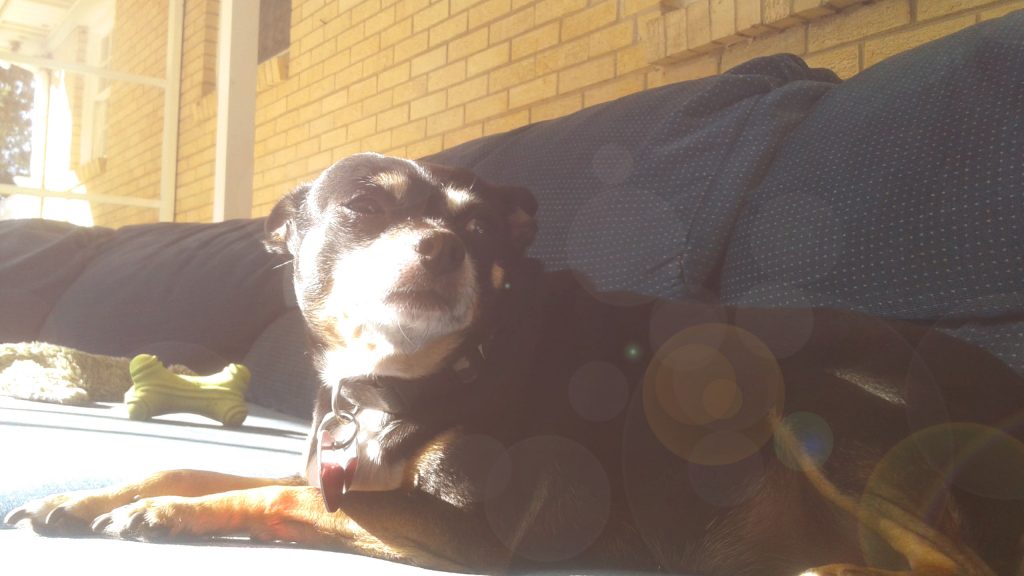
That seemed like a LOT of steps, but it was fun watching what each step did to the photo. You can, of course, adjust any of the layers to suit your own tastes and how you want the photo to look in the end. Just do some experimenting and see what happens 🙂

Anne HERBERT said...
on June 3rd, 2019 at 7:42 am
What a fantastic tutorial! Looks like a ton of fun, and I love the effect.