Tutorial Tuesday: Filling a digital pocket
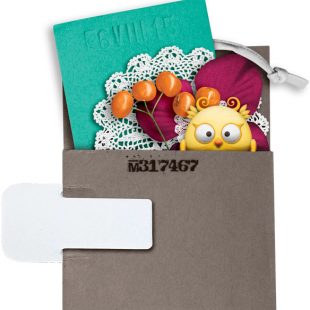
A lot of digital kits contain pocket elements… and sometimes you want to put things into those pockets! This tutorial will show you how to do that realistically ♥ In my colorFALL bundle, you’ll find a pocket and some berries…
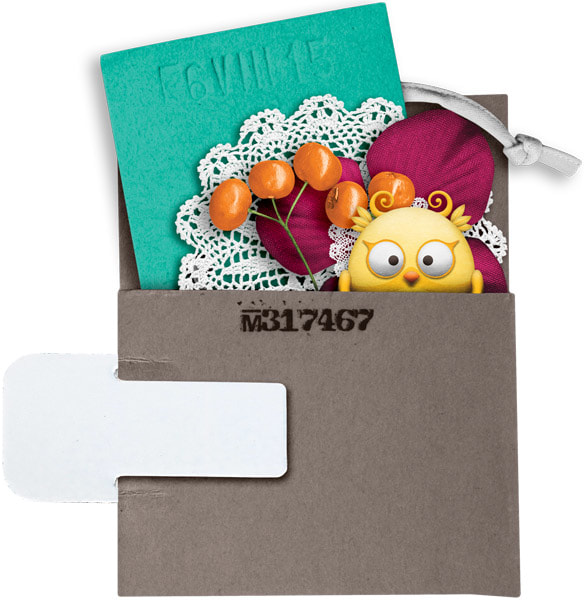
I’m going to show you how to go from the left image to the right image:
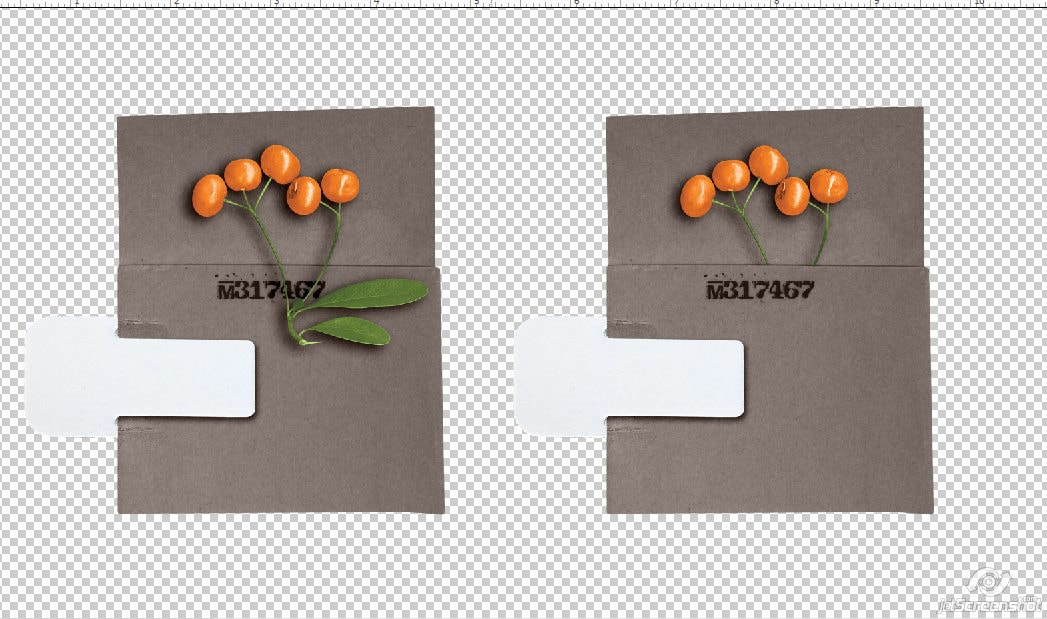
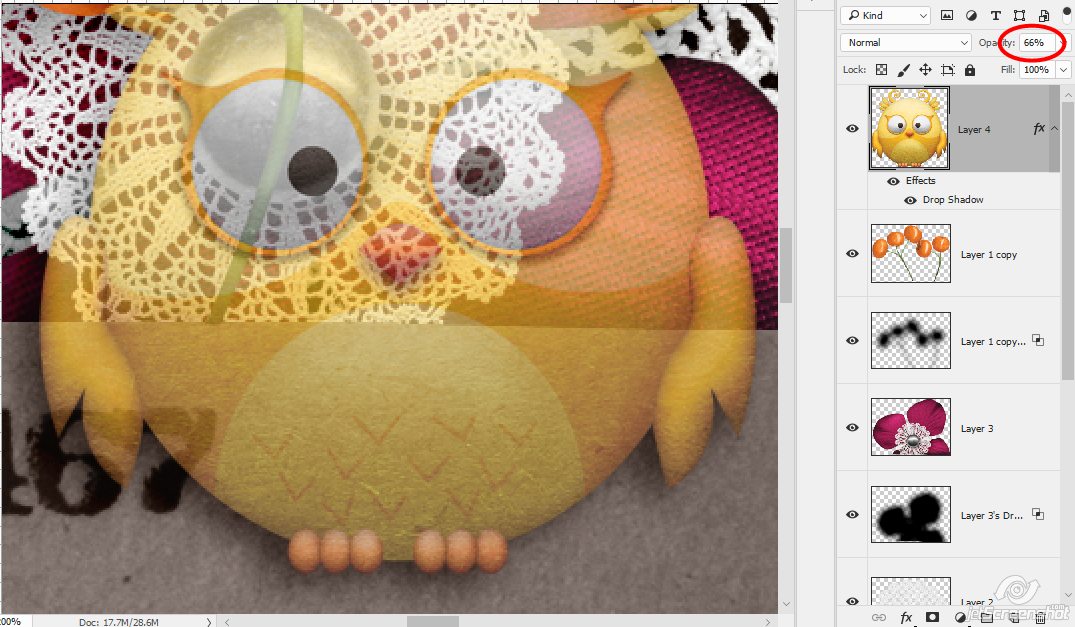
I’ve shadowed the berries element and laid it out on top of the pocket
You’ll need to separate the shadow from the element. Easy enough to do in PS CS and PS CC – you just right click on the berries and click on “Create Layer”. For those of you using PSE, double click on the FX icon that appears on the layer with the shadow you want separated. Move the distance slider to a bigger number. When you move the distance slider, you want the shadow to NOT TOUCH the element. Very important! When you’ve got the shadow moved out, hit OK. Right click on the layer and click on Simplify Layer. You should have the element and the shadow showing on the same layer now. Using the rectangle marquee tool, outline the shadow so that the entire shadow is selected (but not any part of the element), then right click inside the box and click on Layer via Cut.
If you do not separate the shadow from the element, when you get to the deleting step below, the shadow will overhang the pocket edge and it won’t look right.
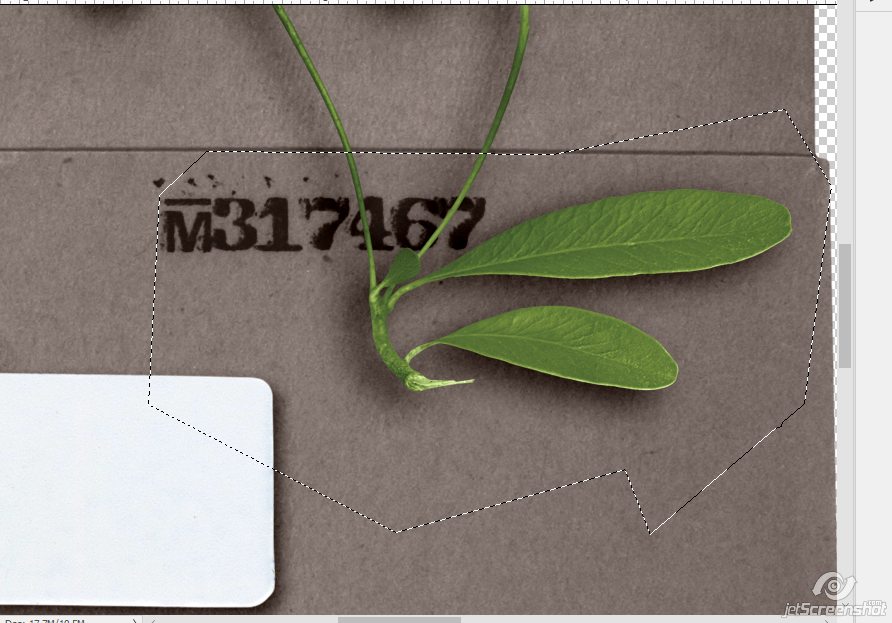
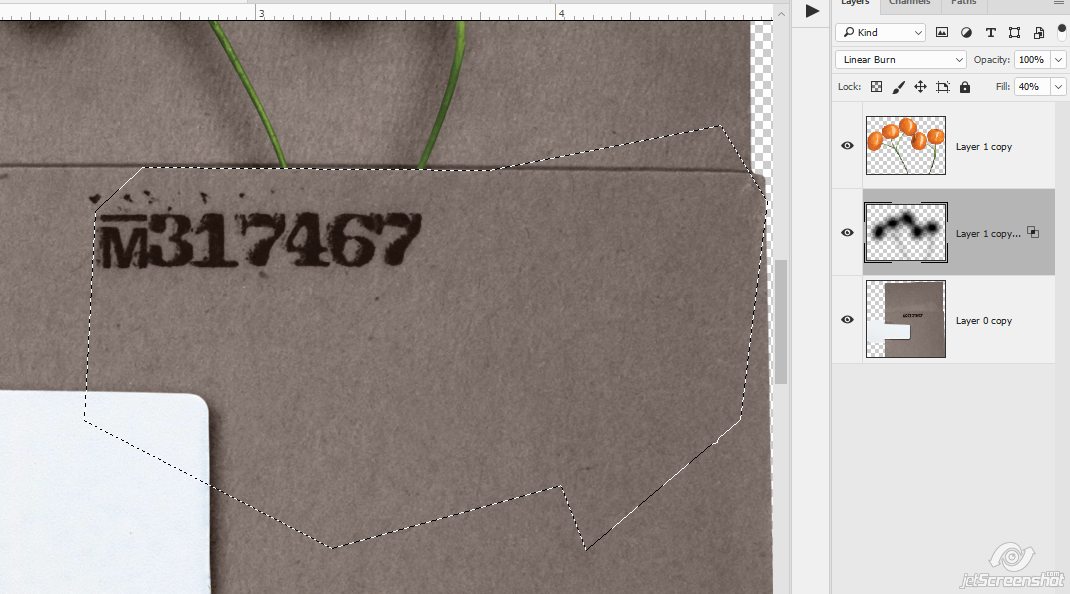
Now click on your Lasso Tool. I like to use the Polygonal Lasso Tool, because it gives me more control over where my selection goes, and I can step-hop it where I want it.

Make the selection around the part of the element that is supposed to be ‘inside’ the pocket. Make sure you follow along the pocket’s edge where the element will be tucked in – this is why I like using the Polygonal Lasso Tool! Half the time my wrist is bound up in a brace and I get all wobbly, so the Lasso Tool doesn’t really work for me and the Magnetic Lasso Tool sometimes has a mind of it’s own!
If your element is covering the pocket line, and you can’t see where to make your selection, keep reading…
there are a couple of tips for that towards the end below.
With your element highlighted (chosen/selected/however you want to say it) in the layer palette, hit the delete key.
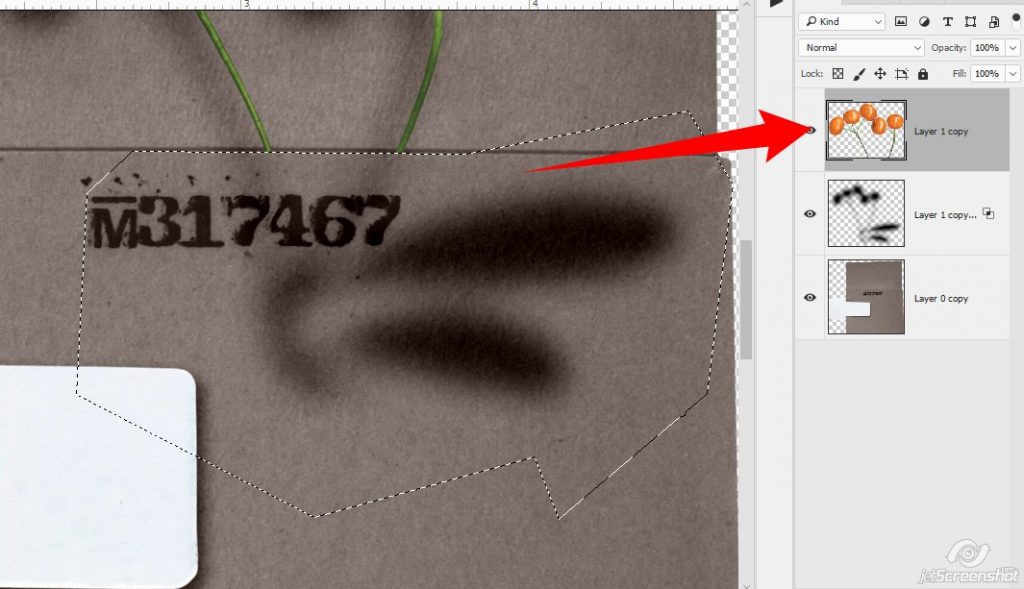
Then click to highlight/select/choose your element’s shadow layer and hit the delete key again
Now your element is “tucked into” the pocket, but I like to take it one teeny step further. Select the Burn Tool.

I’ve tapped on the bottoms of the stems here where the red circles are to make them a little bit darker so that it appears to have a bit of shadowing from the pocket flap
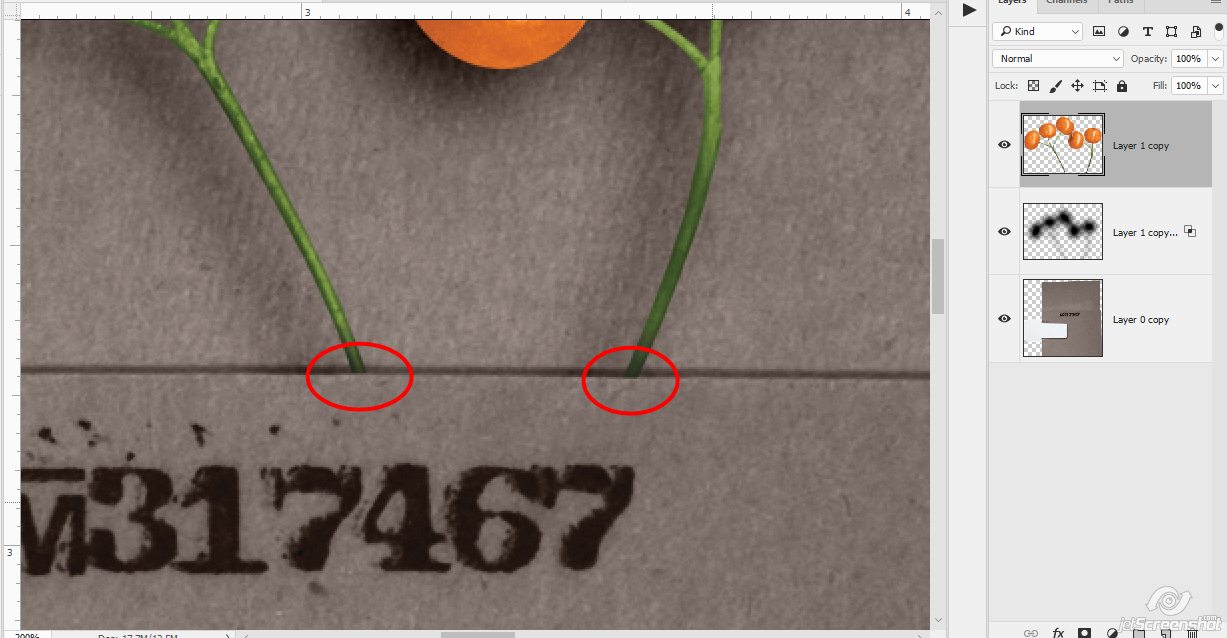
Doing this adds just a little bit more of a realistic feel to the pocket overall

Now you can rinse and repeat for other elements if you’d like! I’ve added a paper card here and want to add this doily, but it’s hard to see the pocket line
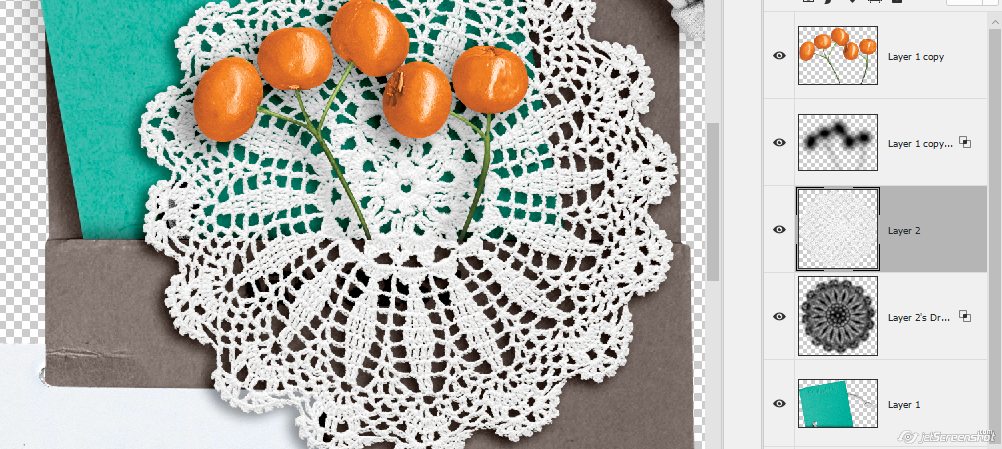
I’ve just hidden the doily and it’s shadow layer so I can see where the pocket line is:
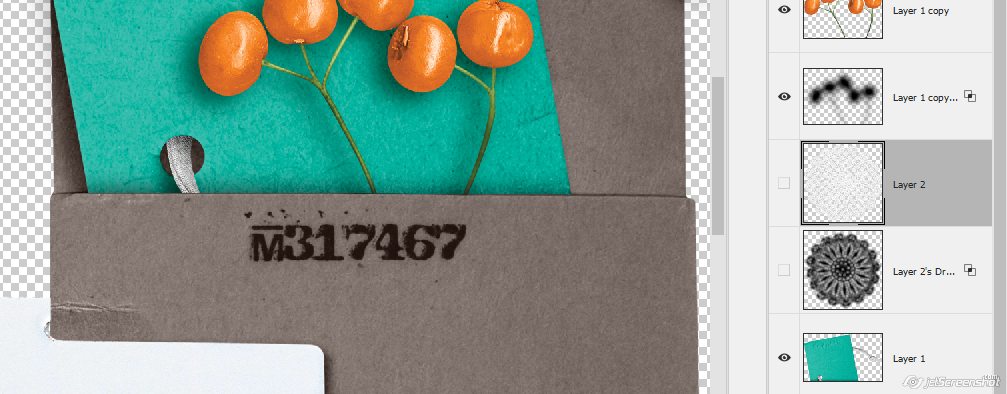
Once the selection area is made, you can unhide both layers and delete the ‘extra’.
Alternatively, you can lower the opacity on the element until you can see through it enough to make your selection.
That’s all there is to it!
Comments are closed.