Tuesday Tutorial: Improving Color with White Balance
If you are shooting in RAW format, you probably already know this little trick to improve the color of your photos using white balance. For those people who shoot in JPG format, you may not have known you even had a Camera Raw filter (like me) and can use it to adjust the color tones on your JPGs.
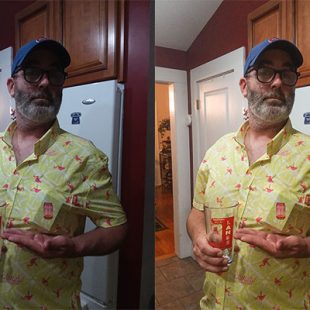
I KNOW. It just goes to show how much we (meaning I) pay attention to our (meaning my) programs, lol! But check this out… here’s a photo of my sweet baby brother, taken with a phone, so yea, in the left image, the lighting is off, the color is off… indoor photos just never turn out fabulous for me, hence why I’m always on the lookout for tips & tricks to make them look better, like the image on the right…

*images will open bigger in a new window if you need a closer look*
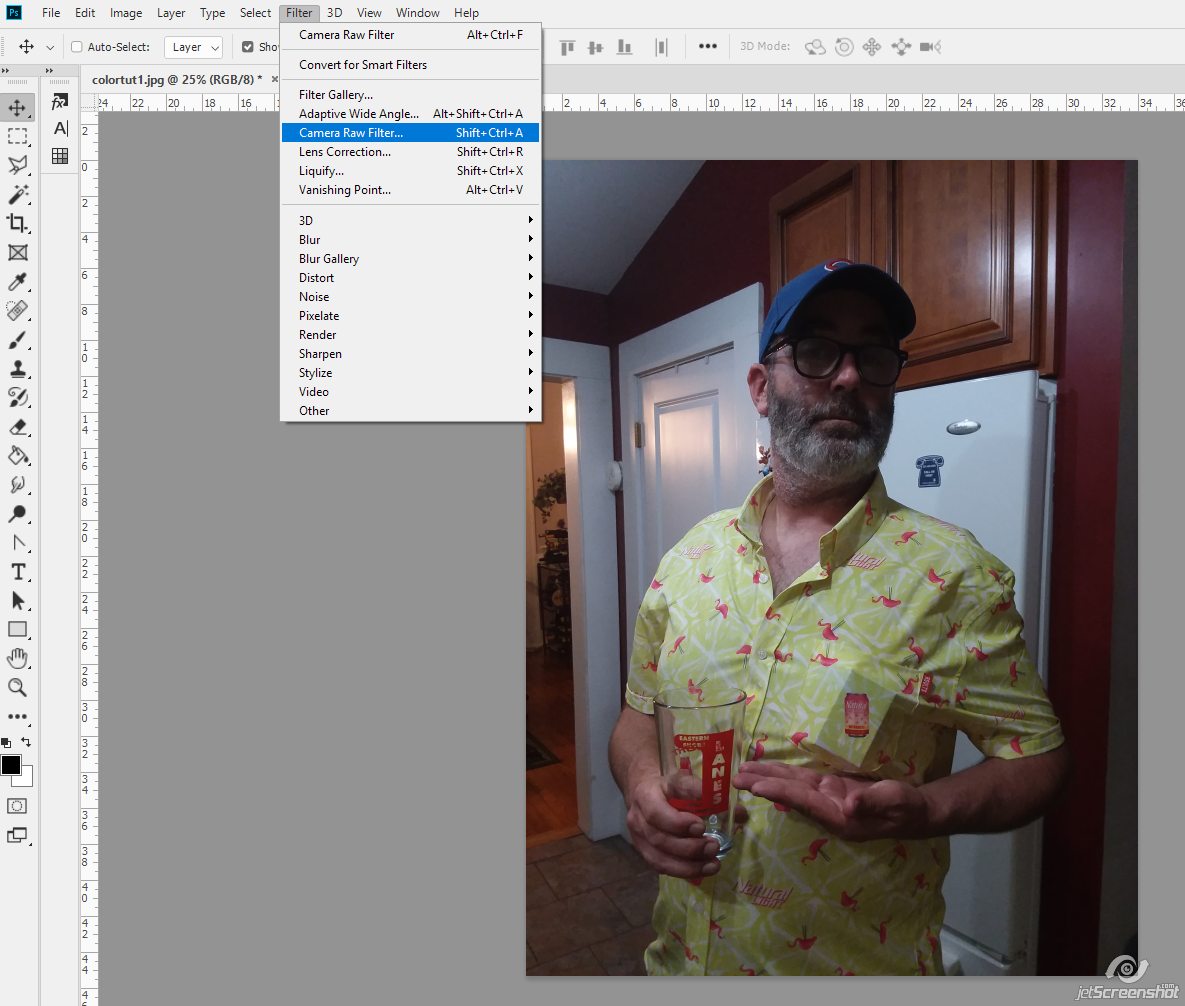
Open your image in Photoshop, then click on Filter > Camera Raw Filter:
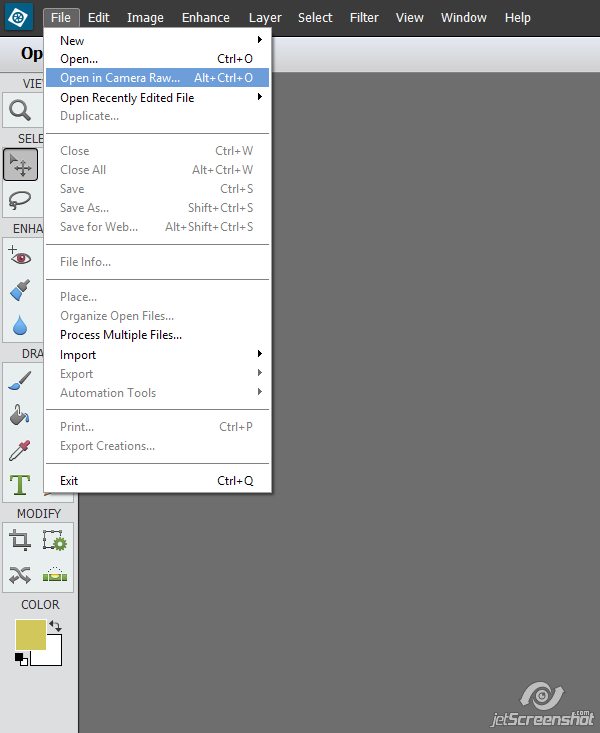
If you are using PSE, go to File > Open in Camera Raw…
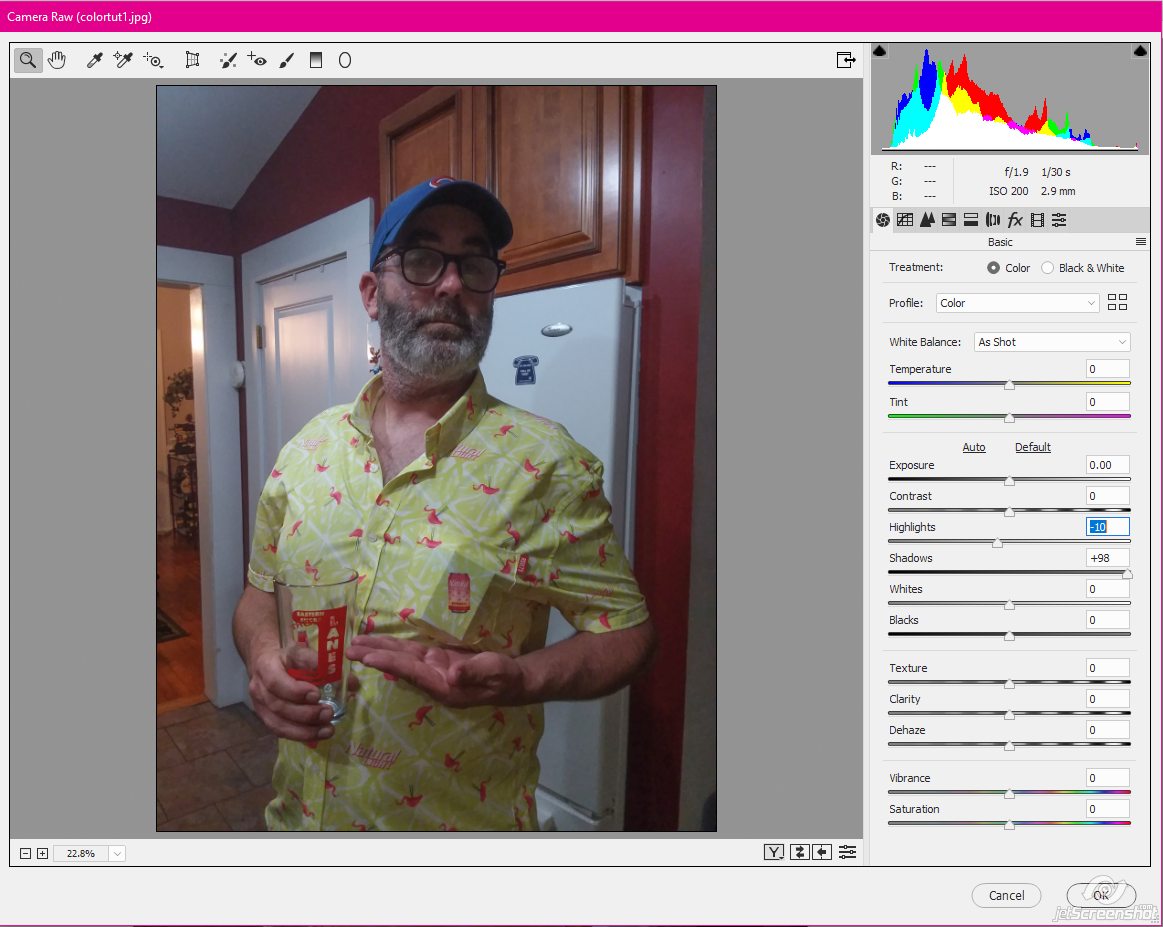
You’ll have a big popup box open up for you:
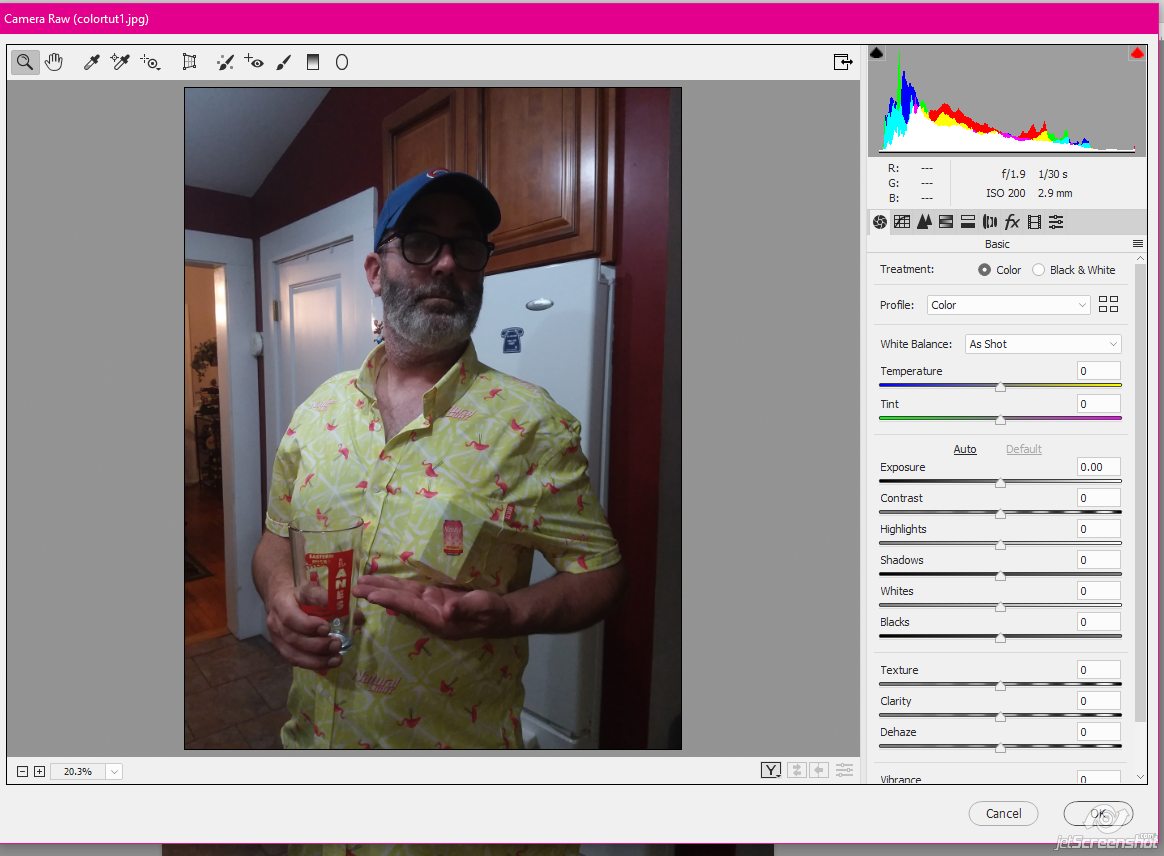
For the most part, you want to concern yourself with the sliders for Highlights, Shadows, and Temperature… and there is no magic number for each slider. This is something you’ll have to play around with until you’re happy with the way the end result looks, because every photo is different 🙂
I always start with the Shadows slider. For this photo I took that slider almost all the way to the right. Then moved to the Highlights slider and bumped that down a bit.
Next, I moved to the Temperature slider & bumped that up a bit

It’s looking good, but still seems a little dark, so I also bumped the Exposure slider up a hair:
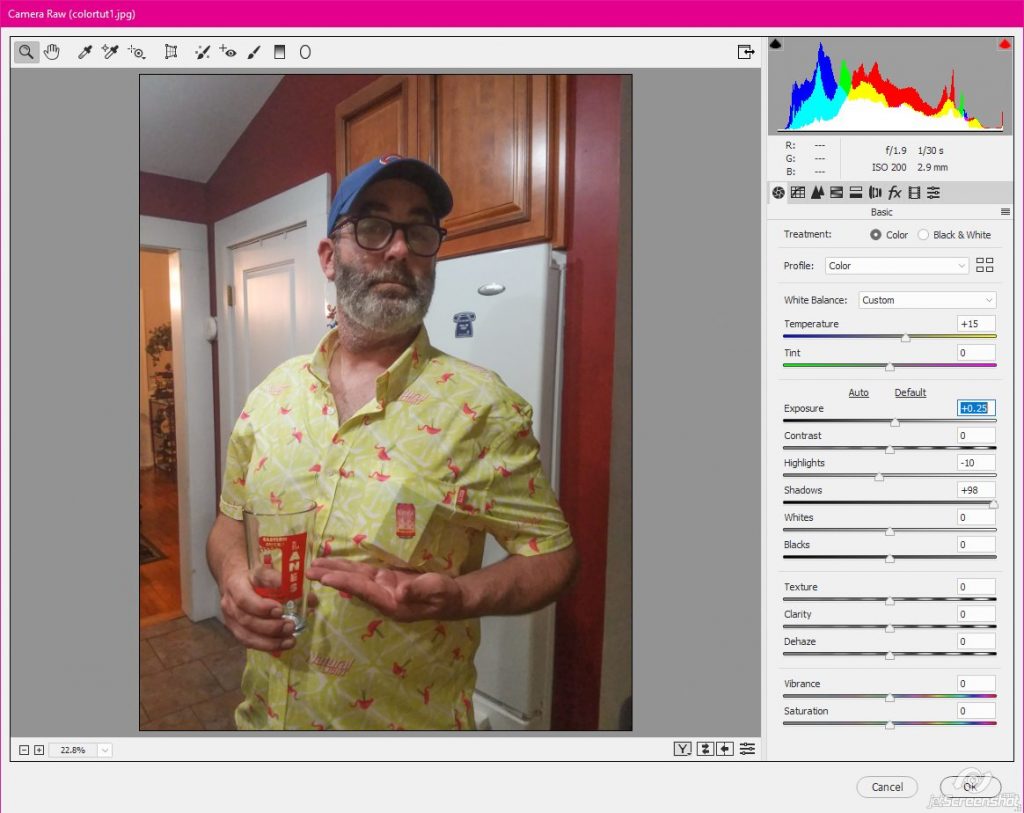
It’s just about perfect now, but I decided it needed a little more Vibrance, and a little more Clairty, too:

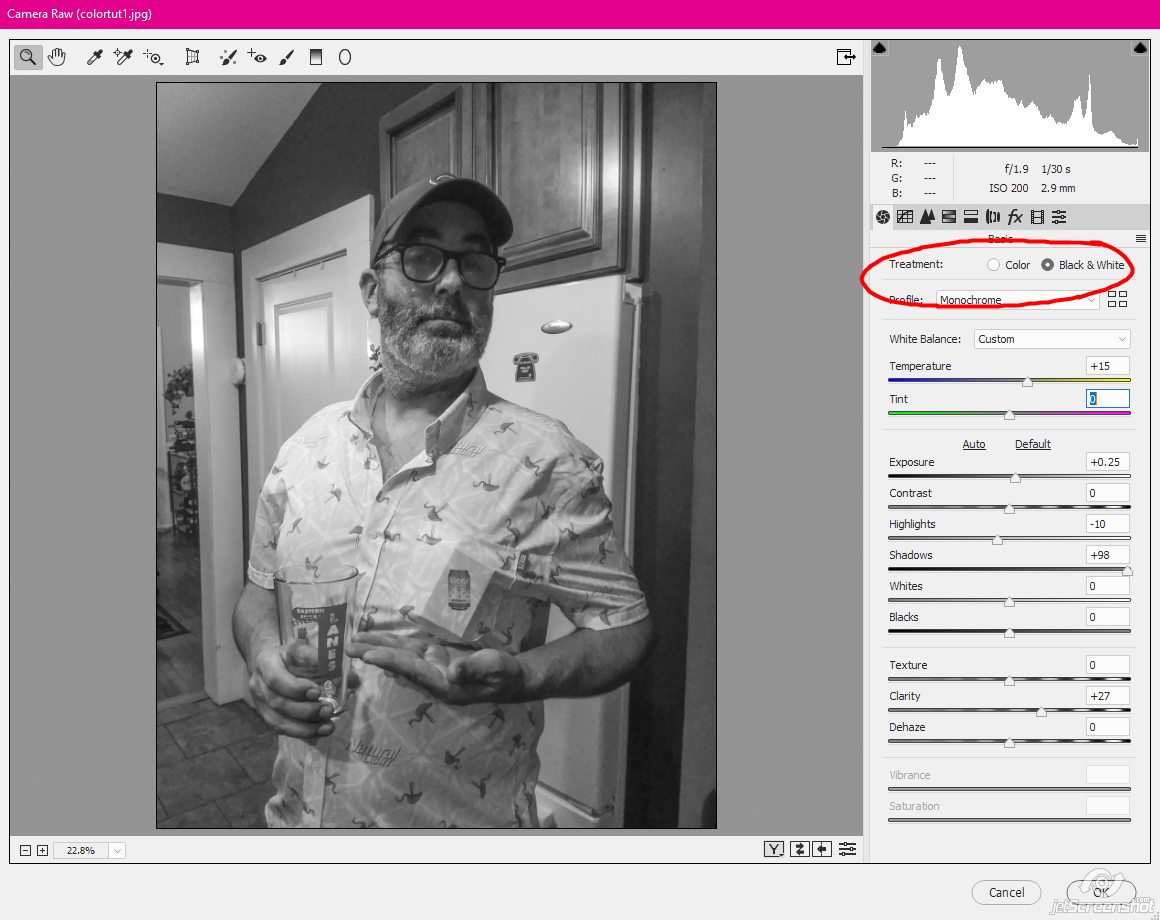
From here you can further edit if you wish following this tutorial here, but I am pretty happy with the way this looks now. A little more natural, and his face isn’t hiding in shadows. Pretty quick, wasn’t it? And, hey, if you wanted to play with it in black & white instead, just tick the radio button for black & white – easy!

Yet another quick & easy photo edit!
Kimberly Behrig said...
on July 16th, 2019 at 8:00 am
I usually use the button that fixes everything at one time, in PSE, but I will check out the way you just talked about…that I didn’t know about. Sounds fun and easy. I have cloudy pictures from the shore from a very cloudy misty day and thought ALL my pictures were ruined ? but in PSE I was able to clear them ALL!! ?