Tutorial Tuesday: Siggies
We had a lot of questions about siggies during our last Siggy Mojo Challenge! Beth suggested putting a tutorial for them here on the blog, and I thought that was a fab idea! So here we go!
Download the PDF – for PS/CC users : for PSE users
Images open in a new window if you need to see them better.
Images open in a new window if you need to see them better.
Start a new 12″ x 5″ canvas. I like to start with a white background (so i can see what I’m doing) and an alpha to spell out my name

Then I build my siggie – saving along the way, so I don’t lose anything



Once my siggie is built, it’s time to save. First, delete the white background (if you have one)

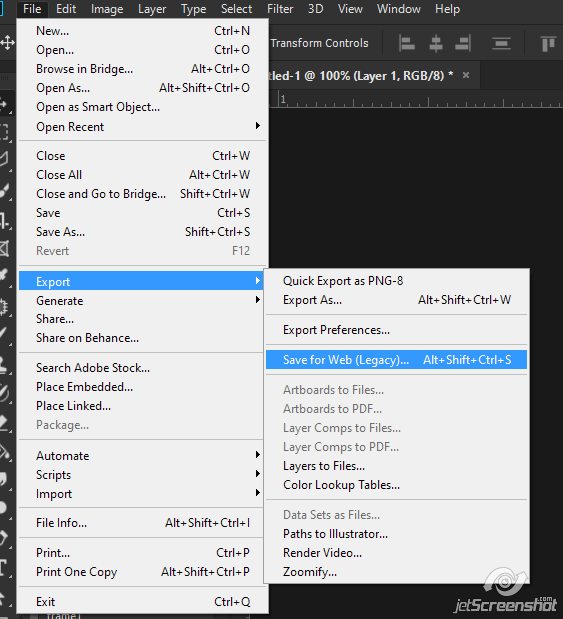
If you are a PS/PS CC user, click on File > Export > Save for Web (Legacy)
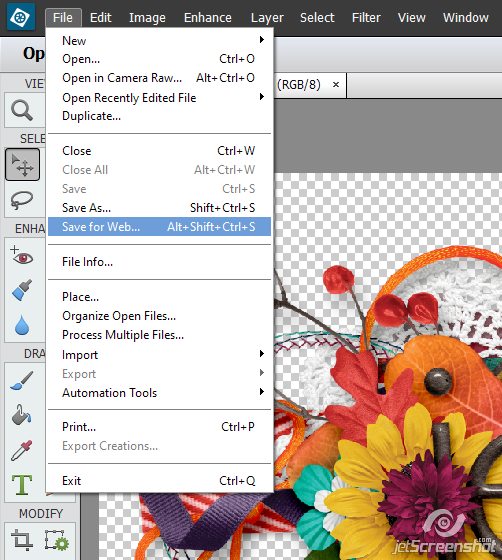
If you are a PSE user, click on File > Save for Web
There are a couple of options you can go with here. Whichever option you go with, just make sure your new image size has been changed to fit the forum (usually 800px or 600px wide will do), and that your file size in the lower left corner is under 250k.
You can save with the PNG-8 Preset. This will give you one of the smallest file sizes, however, for this particular siggie, I end up with a white background around all of my shadows in both PS and PSE (note that the dark/black background is in PS and the light/gray background is in PSE)
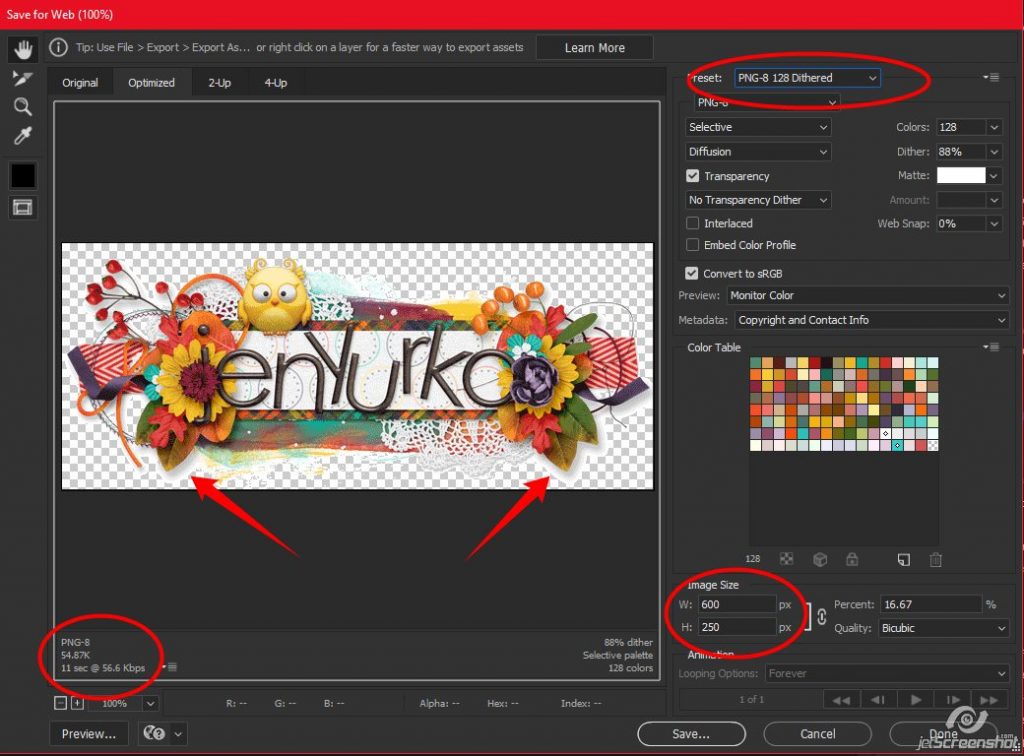
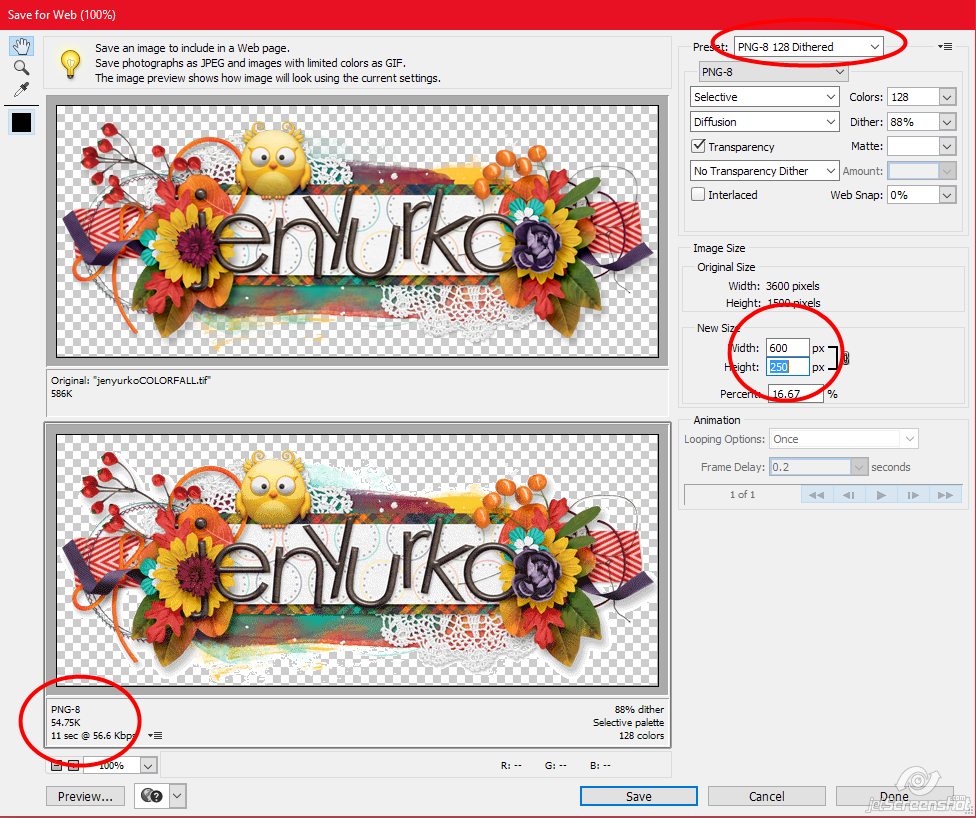
I can change the colors to 256 and the Matte to none, but then I lose my shadows completely
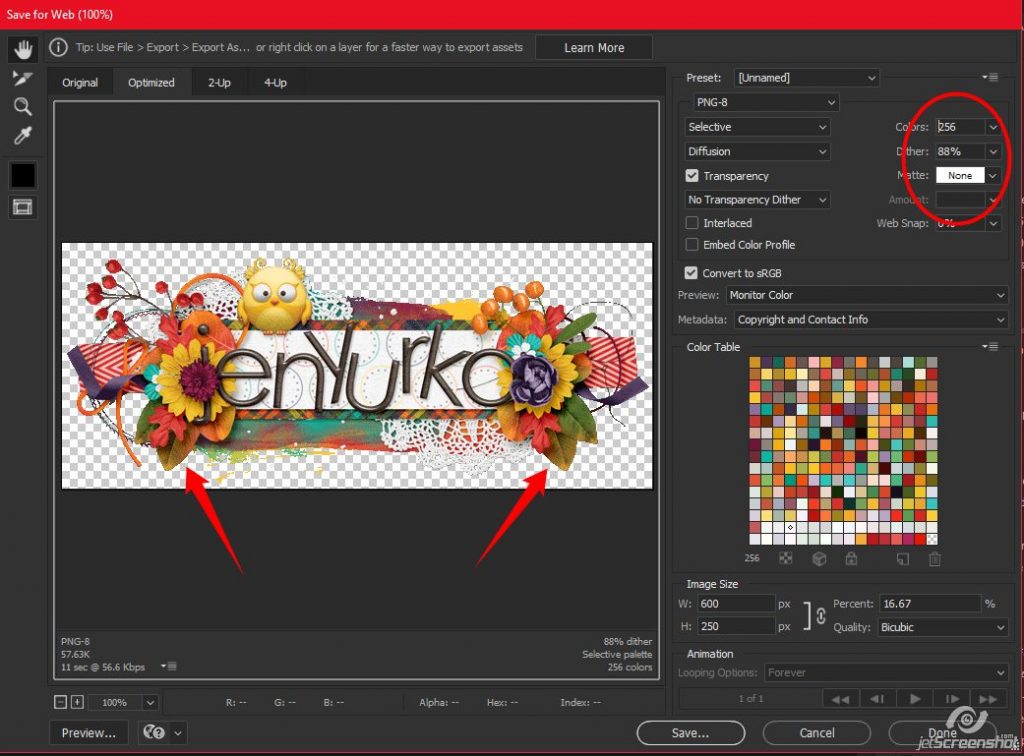
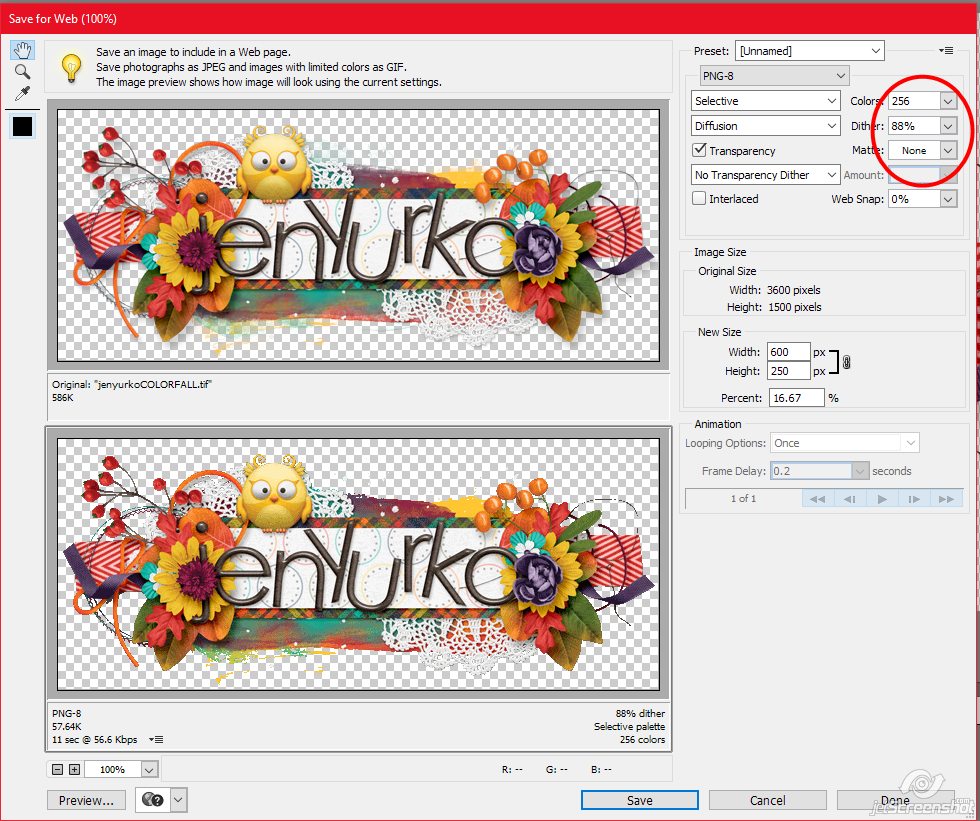
I’ll need to choose a different setting, but if one of these works for you, click save. Not all siggies will show the white background at the PNG-8 preset
The PNG-24 setting works way better for my siggie – there’s no white background around my shadows, which are still in tact. This is a bigger file setting, though, so I had to bump my image size down to 525 to get it under the 250k mark.
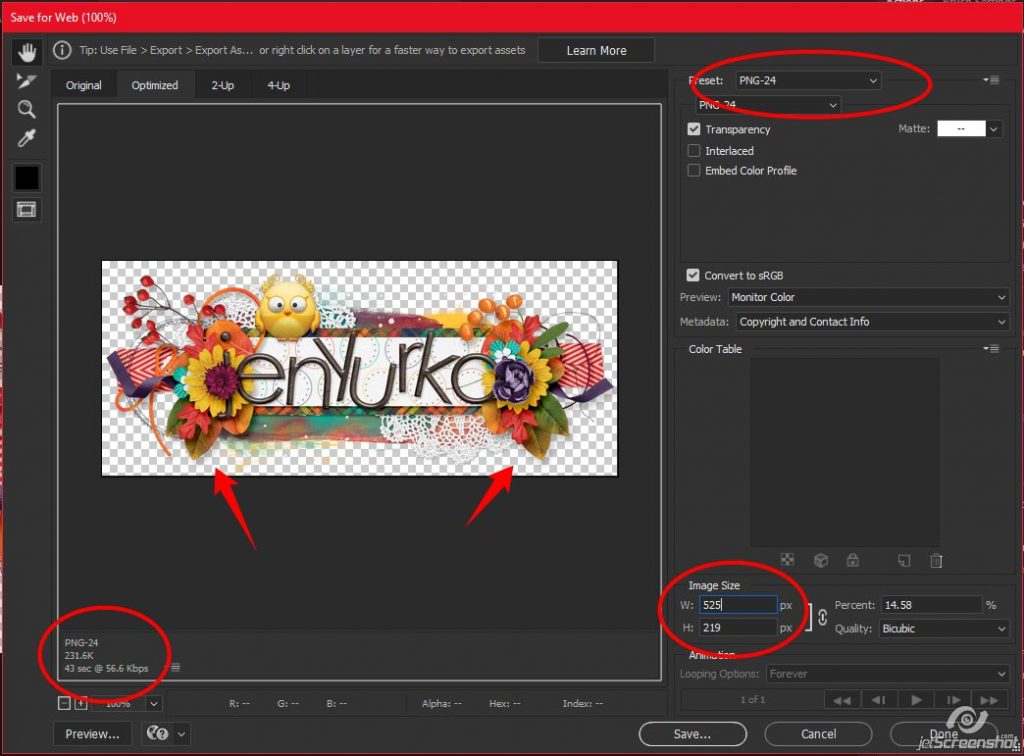
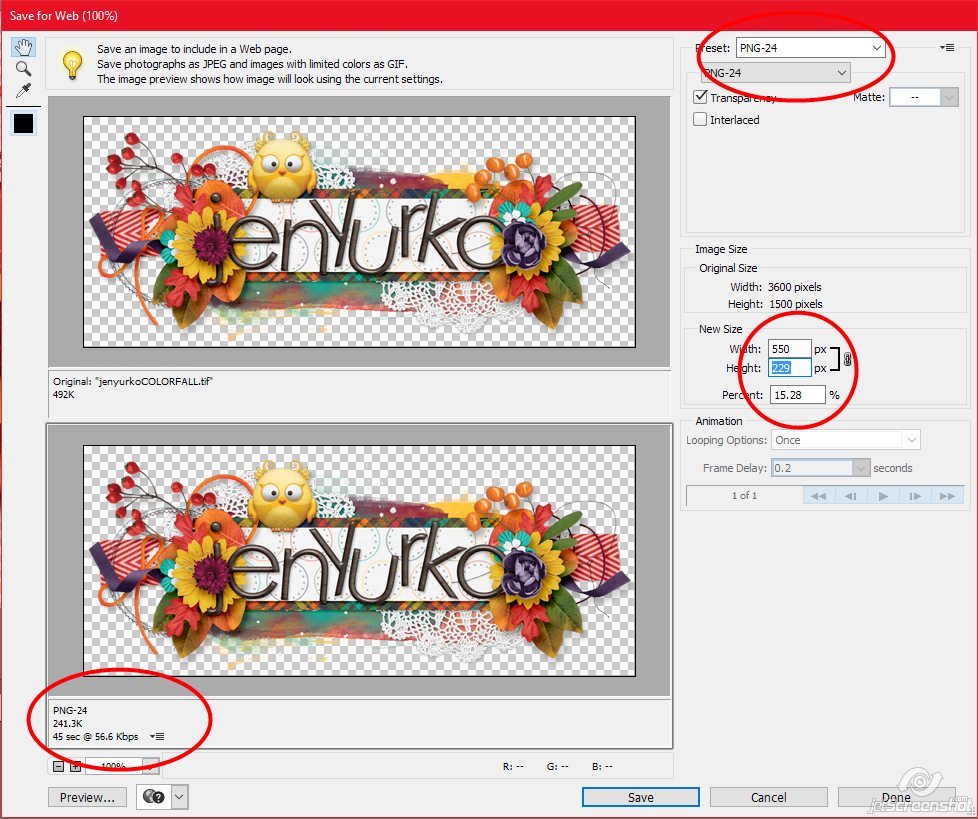
Another option is the JPG preset. Because our forum background is white, using a white background is okay – it won’t show. But if you plan to use your siggie on another site, and the background isn’t white, it’s going to show.
This is also one of the smaller file sizes, too.
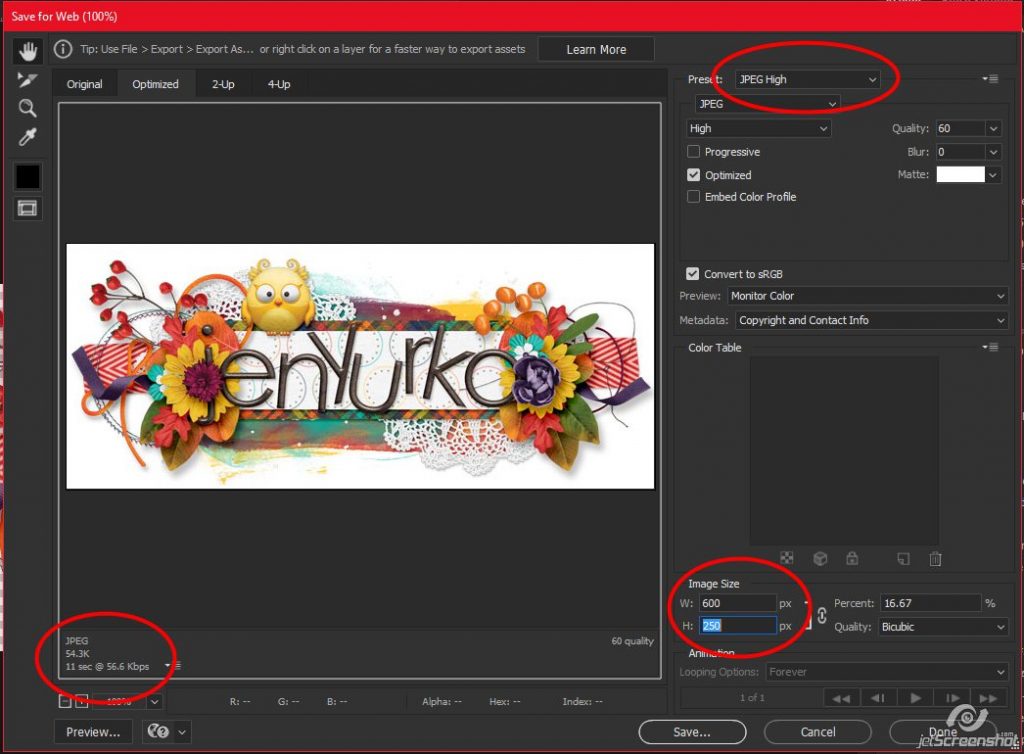
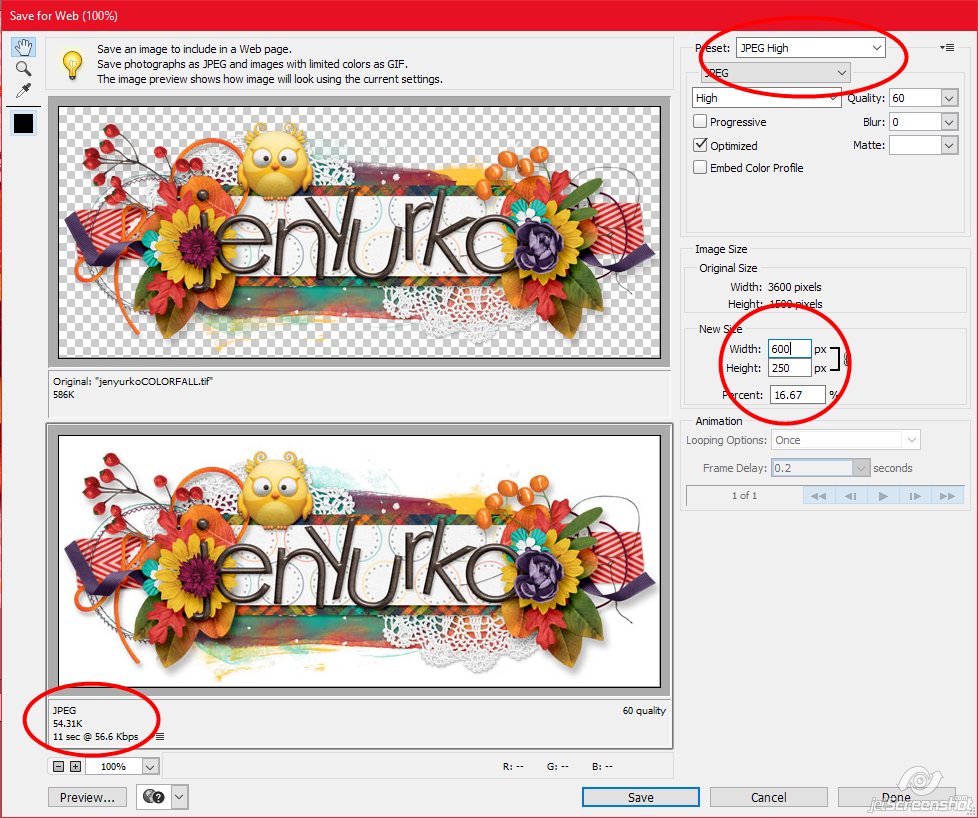
This is my siggie saved with the PNG-24 option:

Now that you have it saved, you can upload the siggy to your gallery so you can put it in your forum signature.
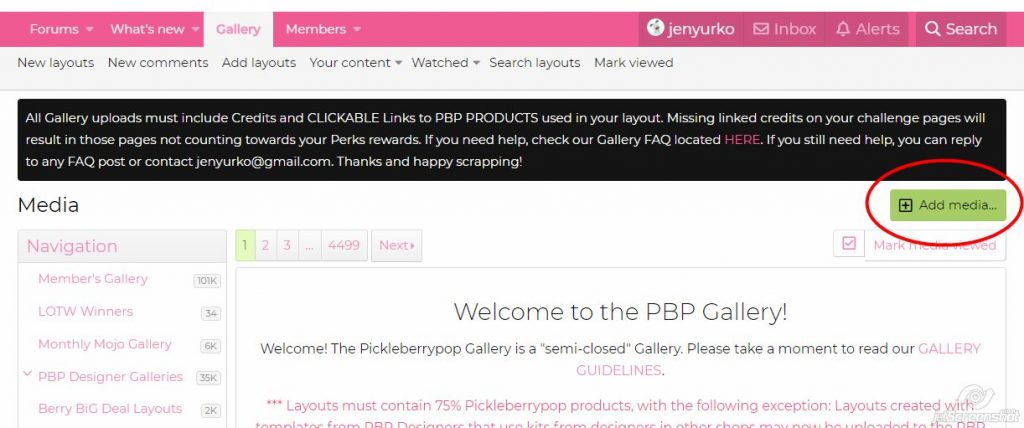
Go to the Gallery and click on Add Media
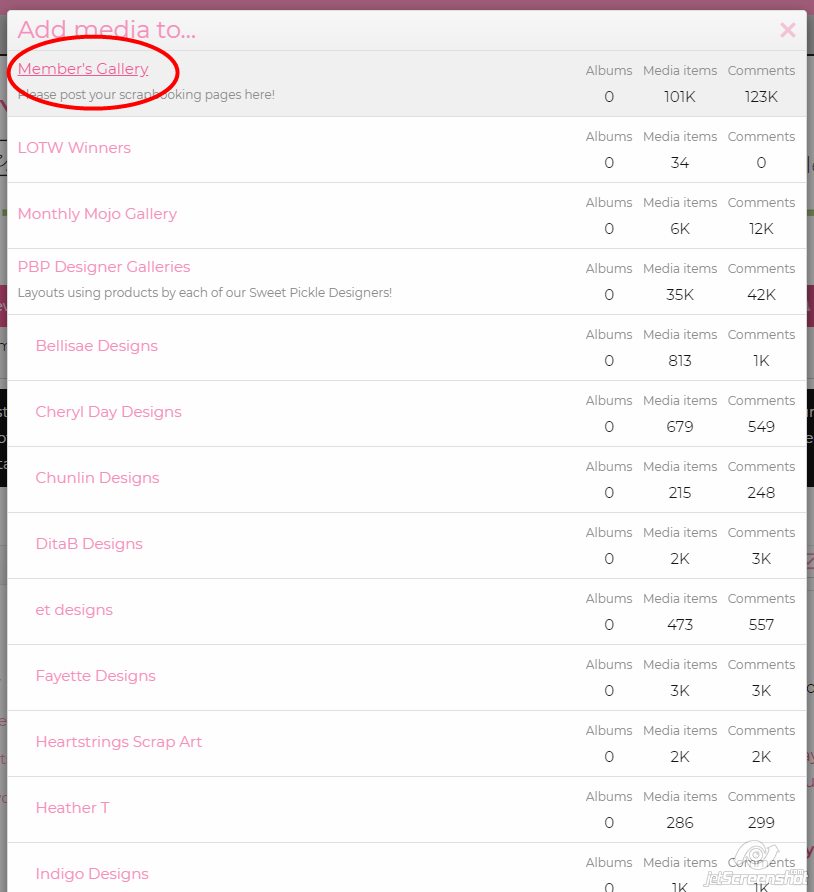
Click on Member’s Gallery
Click on the Upload File button
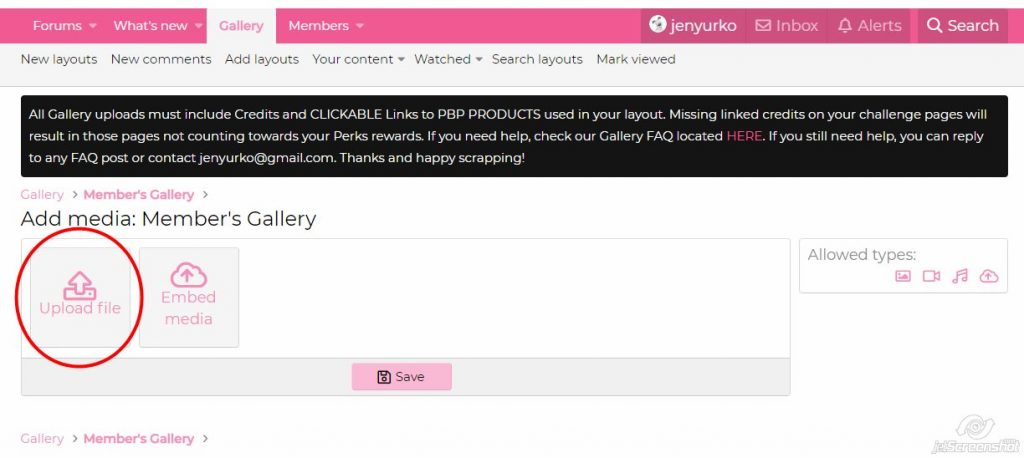
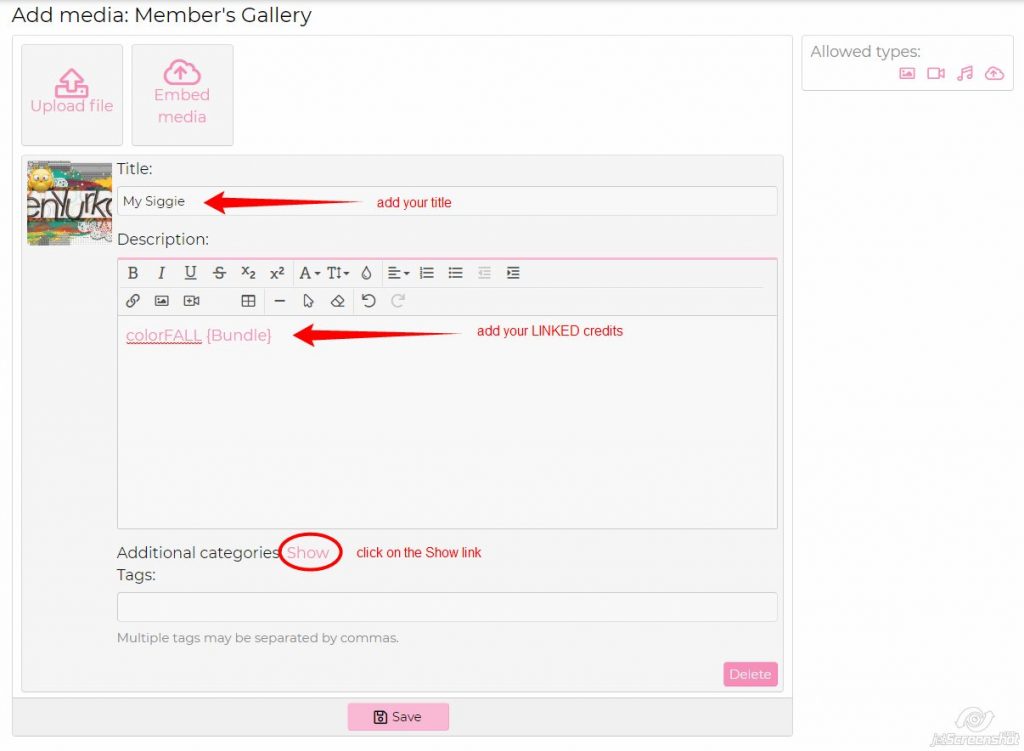
Add the Title, LINKED credits, then click on the Show link
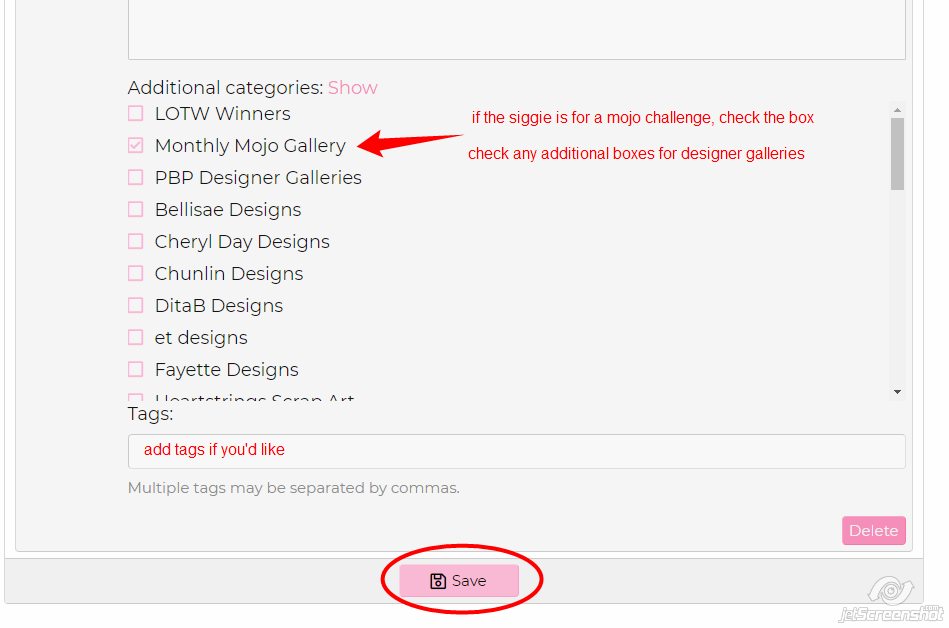
If your siggie is for a mojo challenge, check the box for Monthly Mojo Gallery, then check any additional boxes for the appropriate designer galleries. Add tags if you’d like, then click save
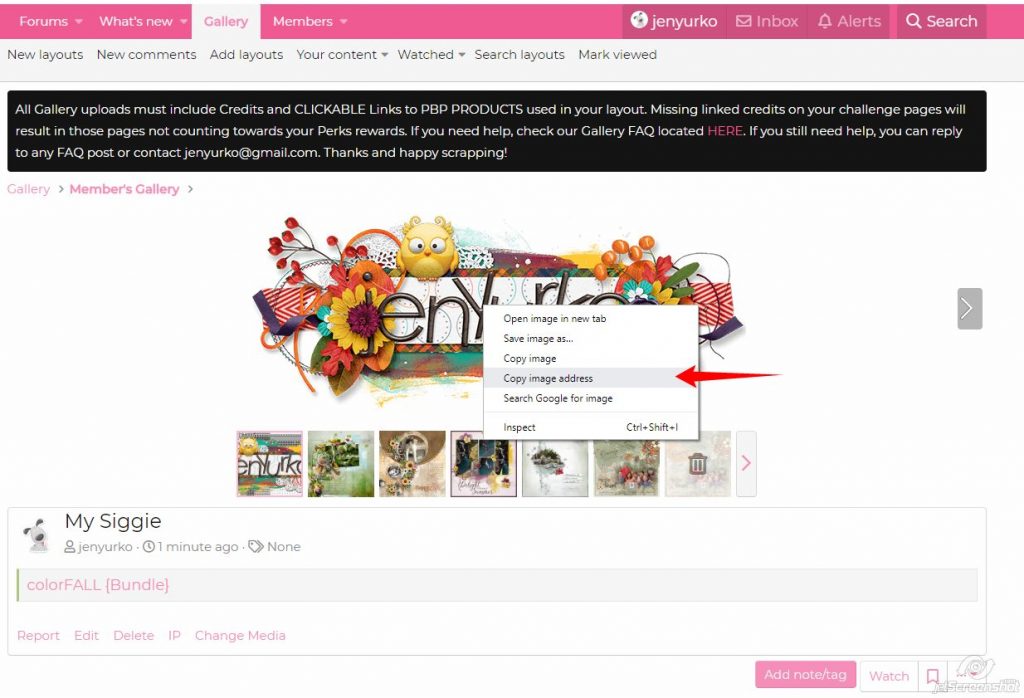
Now to add it to your forum signature! Right click on your siggie in the gallery and click on Copy image address
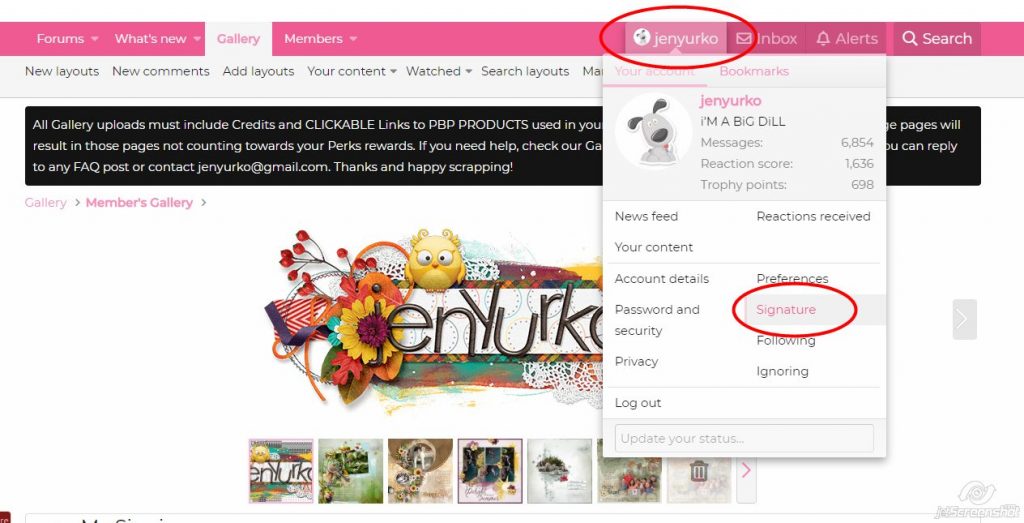
Click on your name on the pink menu bar, then click on signature
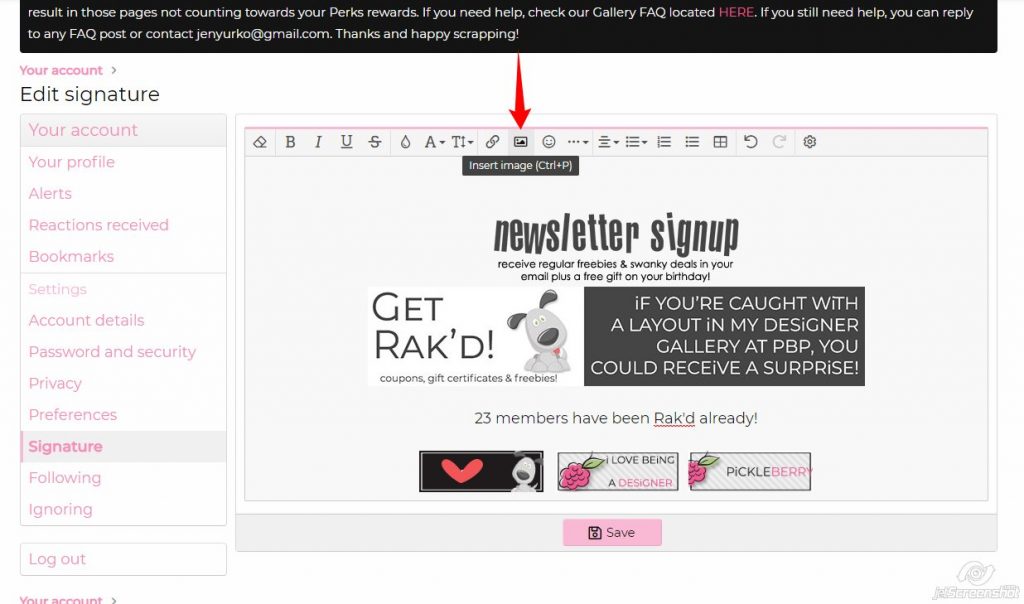
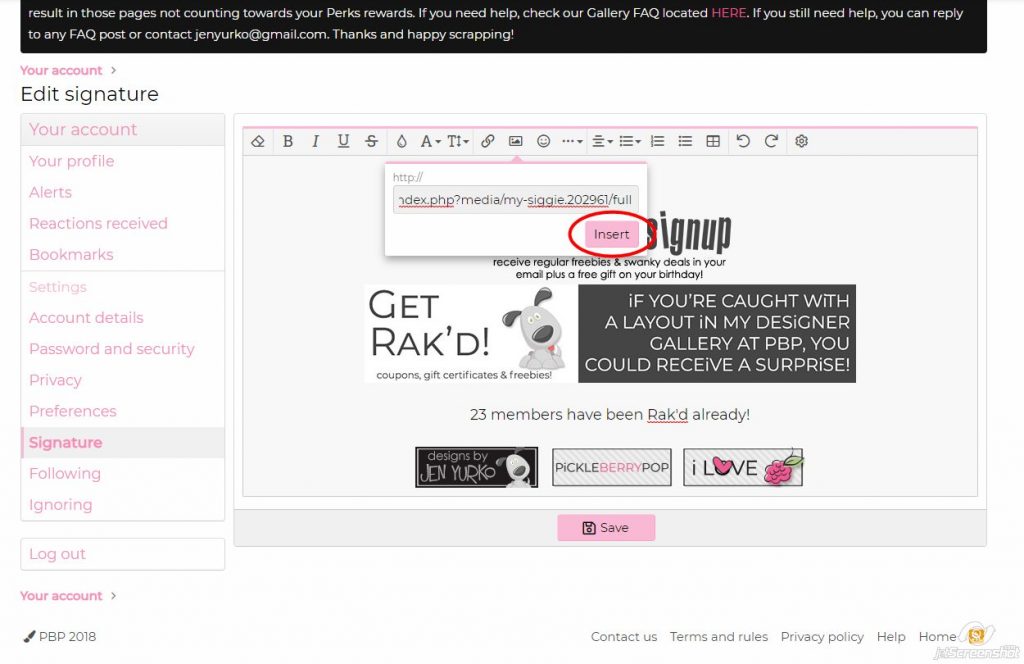
Click on the Insert Image icon
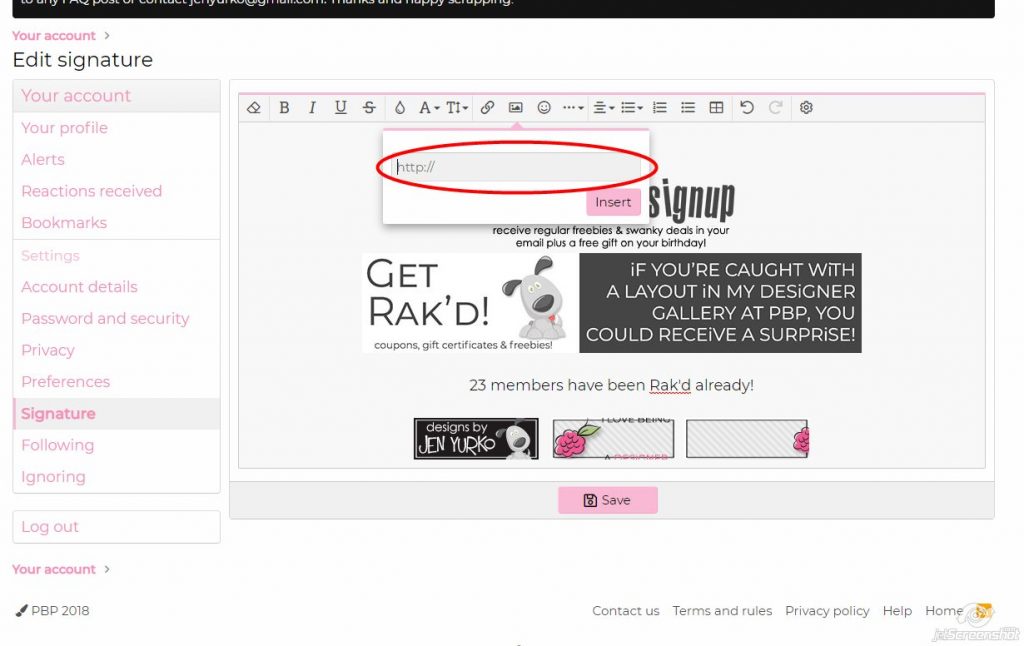
You’ll get a little popup box for a link, paste your siggie image link that you just copied into that box. You can use CTRL-V or right click in the box and click on Paste
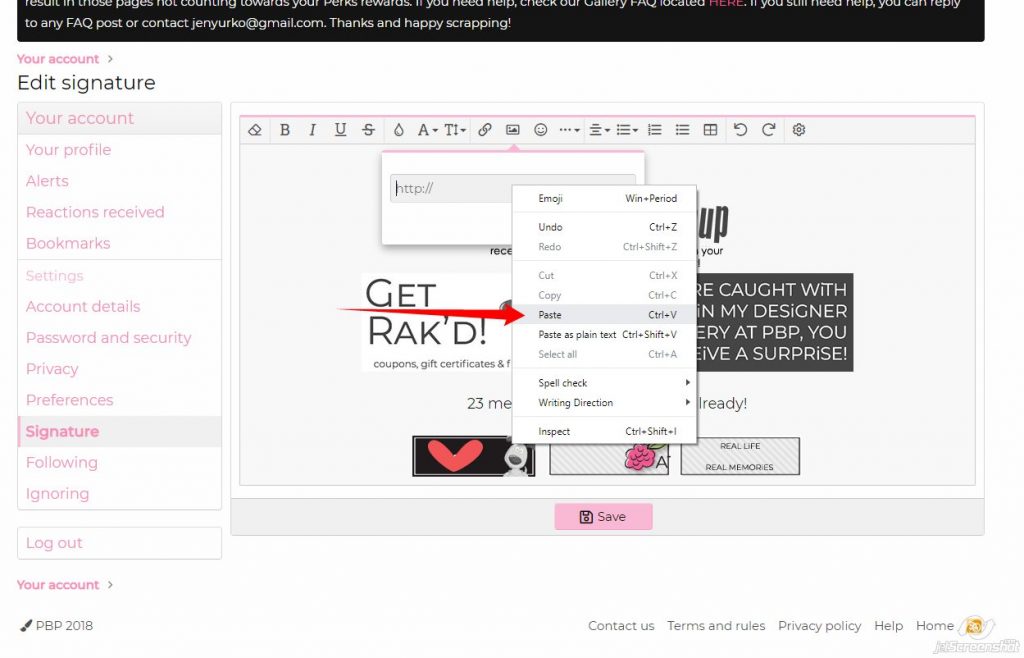
Then click on Insert
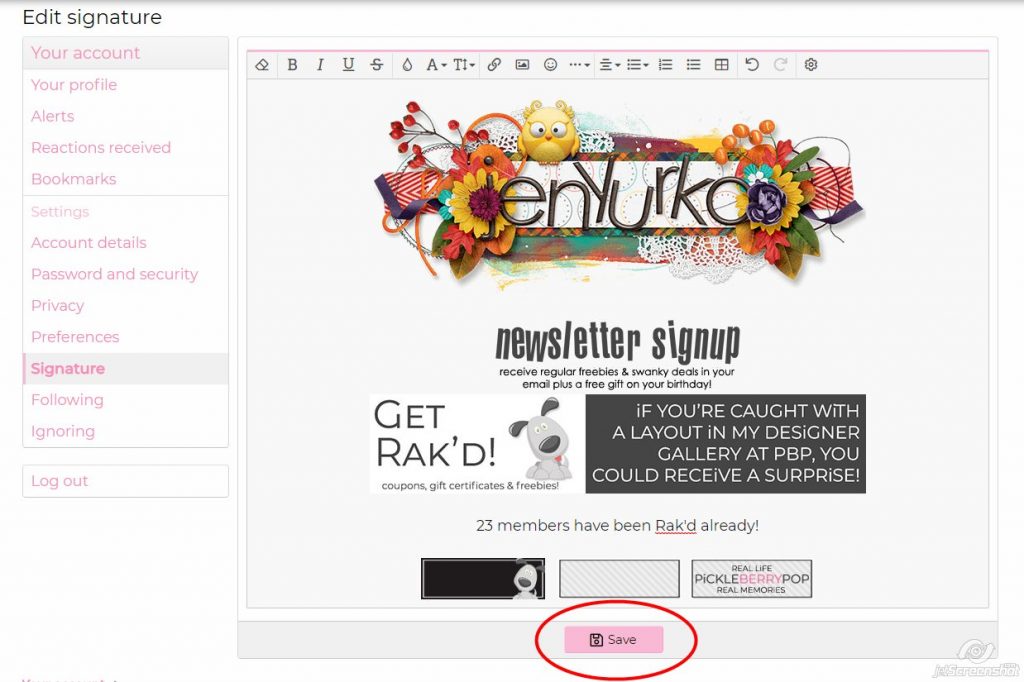
Then click on Save
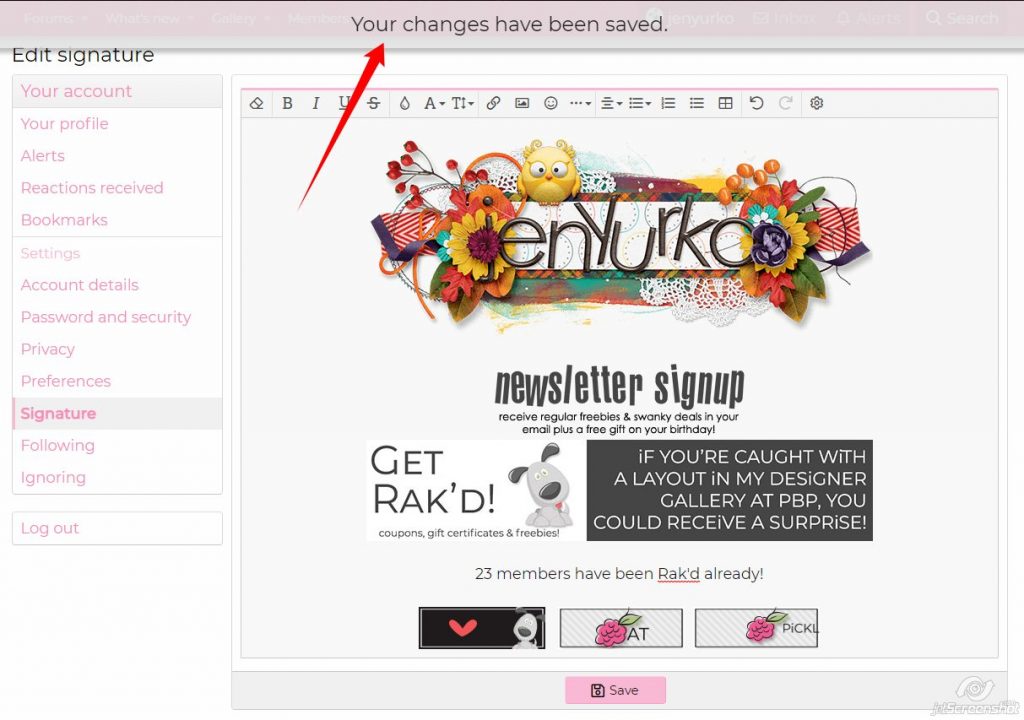
A message will flag at the top of the page that your changes have been saved
If you’d like to save this tutorial, you can download it using these links:
for PS/CC users : for PSE users
It includes everything on this post 🙂
Have fun and have a great Tuesday!
PiCKLEBERRYPOP » Monday Mojo said...
on October 21st, 2019 at 12:02 am
[…] have another siggie challenge for you this month, too. We’ve even pulled together a siggy tutorial that you can you download and use – it’s at the end of the post or you can go to the […]