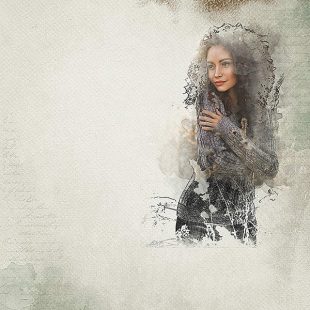
Tutorial Tuesday: Sketch Effect
Not too long ago, someone asked me to hunt down a Sketch Effect tutorial that we had on our forum once upon a time. This was a popular tutorial – and very easy to follow – from resident designer Tiramisu design. I thought it was high time it was added to our collection of tutorials here on the site. If there are any other tutorials that you remember being in our challenge forum that are no longer there, please give us a shout and we’ll see if we can hunt it down, too!
Download the PDF HERE
Hi everyone, Natalie from Tiramisu design is here. This month I want to show you a very interesting Sketch Photo Effect Tutorial. This is not my author’s technique, I borrowed it from Scrappie Irene, I hope you like it. I want to see your layouts with photos that you have edited using this tutorial. So let’s start SKETCH PHOTO EFFECT TUTORIAL
This is the original photo ( taken from the @pixabay)

STEP 1
a. Open you photo and place it on your background paper.
b. Make a copy of the photo layer and make it invisible.

STEP 2
Select Layer 1 and go to Filter >Stylize >Find Edges


STEP 3
Go to Image > Adjustments > Desaturate (or just SHIFT+CTRL+U)

STEP 4
Go to Image > Adjustments > Curves (or just CTRL+M) make the curve as shown on the image.


STEP 5
Change Layer’s 1 blending mode to MULTIPLY


STEP 6
Add to Layer 1 a vector mask holding ALT button, after that this layer become invisible, it’s OK!

STEP 7
Paint over the vector mask using WHITE watercolor brush with 40-50% opacity. If you see to hard lines at the edges of the photo, you can switch the brush color to black ( just click X) and remove them.

STEP 8
a. Make Layer 2 visible
b. Add a vector mask holding ALT button to Layer 2 , after that this layer become invisible, that’s’s OK!
c. Paint over the vector mask using WHITE watercolor brush with 40-50% opacity.
Start your painting from the centre of the photo than move to the edges reducing the opacity of the brush, and you will get a beautiful watercolor effect.
If you see to hard lines at the edges of the photo, you can switch the brush color to black ( just click X) and remove them.

The photo is ready!

And this is my finished layout. I’ve used background paper, word art, art transfers and ready for use overlays from my NATURAL collection.

Jodie Crofoot said...
on December 3rd, 2019 at 5:22 pm
Thank You!
admin said...
on December 3rd, 2019 at 5:26 pm
You’re welcome <3
Nancy Smeltzer said...
on February 21st, 2020 at 9:48 pm
What an incredible dreamy technique. Thank you so much for this one.