Techie Tuesday: Camera Settings
As scrappers, we all have cameras – whether you use the built-in camera on your phone, a high-end fancy schmancy camera, or something in between. Even if you just use the built-in camera on your phone, there are settings that you may or may not be able adjust to make your photos come out even better! So let’s talk about some camera settings and what they actually mean on – both on your phone and on your fancy schmancy (or not so…) camera to help you take better pictures than before.
Most cameras built into smart phones have their own special filters – and these vary by phone, but you should be able to find a settings icon (a little gear) somewhere on your phone screen when you open your camera app. I run with a Samsung J7 (once you go samsung you never go back…), and mine is located on the bottom left corner above the video button. Pressing the settings icon, I have a few things I can fiddle with like Picture Size, Video Size, Timer, etc. I set my sizes to the largest my phone is able to take, so that I have bigger images to work with when I get them to my computer. I also have Grid Lines that I can turn on or off, which are really helpful for the Rule of Thirds 😉 Back to the camera screen I have different modes I can take pictures in: HDR, Night, Panorama, Pro, Beauty, Auto, and Continuous Shot. That’s about it. Your phone may have different settings and filters available to you, and I highly suggest you play around with them if you haven’t already to get the best shots possible. Last year, I discovered several apps in the Google Play store that allow you to use DSLR-type settings (like those fancy schmancy cameras!), and the Camera FV-5 app, while it crashes when I switch from camera to gallery (ugh), it takes better pictures than the built-in camera app. I don’t have to do a lot of editing, if any, to my photos when I use Camera FV-5.
DSLR settings. Once you understand what each setting is for, your photos will improve immensely in just a short period of time….
ISO – this is simply a measure of your camera’s sensor’s sensitivity to light (say that 5 times real fast!). Low numbers mean less sensitivity, high numbers mean more sensitivity. 100, 200, or 400 won’t leave a lot of digital noise and are best used in strong daylight. 800, 1600, or 3200 will result in a little bit of digital noise and are best used when the light is not so great (like at night).
Aperture (A/Av) – this is the hole in your camera lens that allows light into the camera. On the camera it is displayed as an f-stop: f/2.6, f/16, etc. The larger the number, the smaller the hole and less light that is let in. The smaller the number, the larger the hole and the more light that is let in. Most smartphone cameras will not allow you to change the f-stop (including mine, even when using the Camera FV-5 app), but on a DSLR camera you should be able to adjust it or set it to auto. Smaller f-stops allow a greater depth of field (more of the image in the photo will be in focus), while larger f-stops will give you a smaller depth of field (less of the image will be in focus).
Shutter speed (T/Tv) – this refers to how fast (or slow) the shutter on your camera opens and closes to let light through to the sensor. The smaller the fraction, the faster the shutter speed. Fast shutter speeds are great for taking photos of things in motion. The larger the fraction, the slower the shutter speed. Slower shutter speeds are awesome for taking photos with sharp, in-focus backgrounds and blurred moving objects or people.
Exposure (+/-) – You can make a scene lighter (+) or darker (-) if the lighting isn’t ideal to keep the camera from auto-adjusting to darken overly bright scenes or turning blacks into grays.
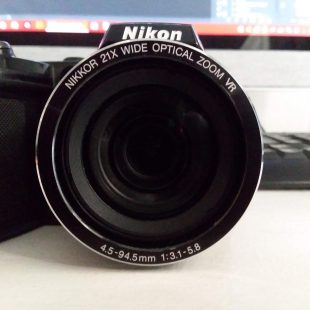
If you have a DSLR camera and haven’t played with these settings yet, I recommend you do so! Seriously, after about an hour of fooling with settings on mine (I have a Nikon that I should really use more often :P), my photos were already turning out better than using the auto modes. If you’re just using your phone’s camera, hit up the google play store (or apple store…) and see if you can find and use one of the free camera apps that will allow you to play with DSLR settings on your phone.
Happy photographing!
Comments are closed.